Usability Membership Portal – New Volunteer – Registration Instructions
If you are new to Special Olympics and want to become a volunteer, Please apply here!
Copy and paste Membership Portal URL to browser and follow the instructions OR
Right Click on URL to open Membership Portal in new tab
https://portal.specialolympics.ca/
From Home Page, Select Registration
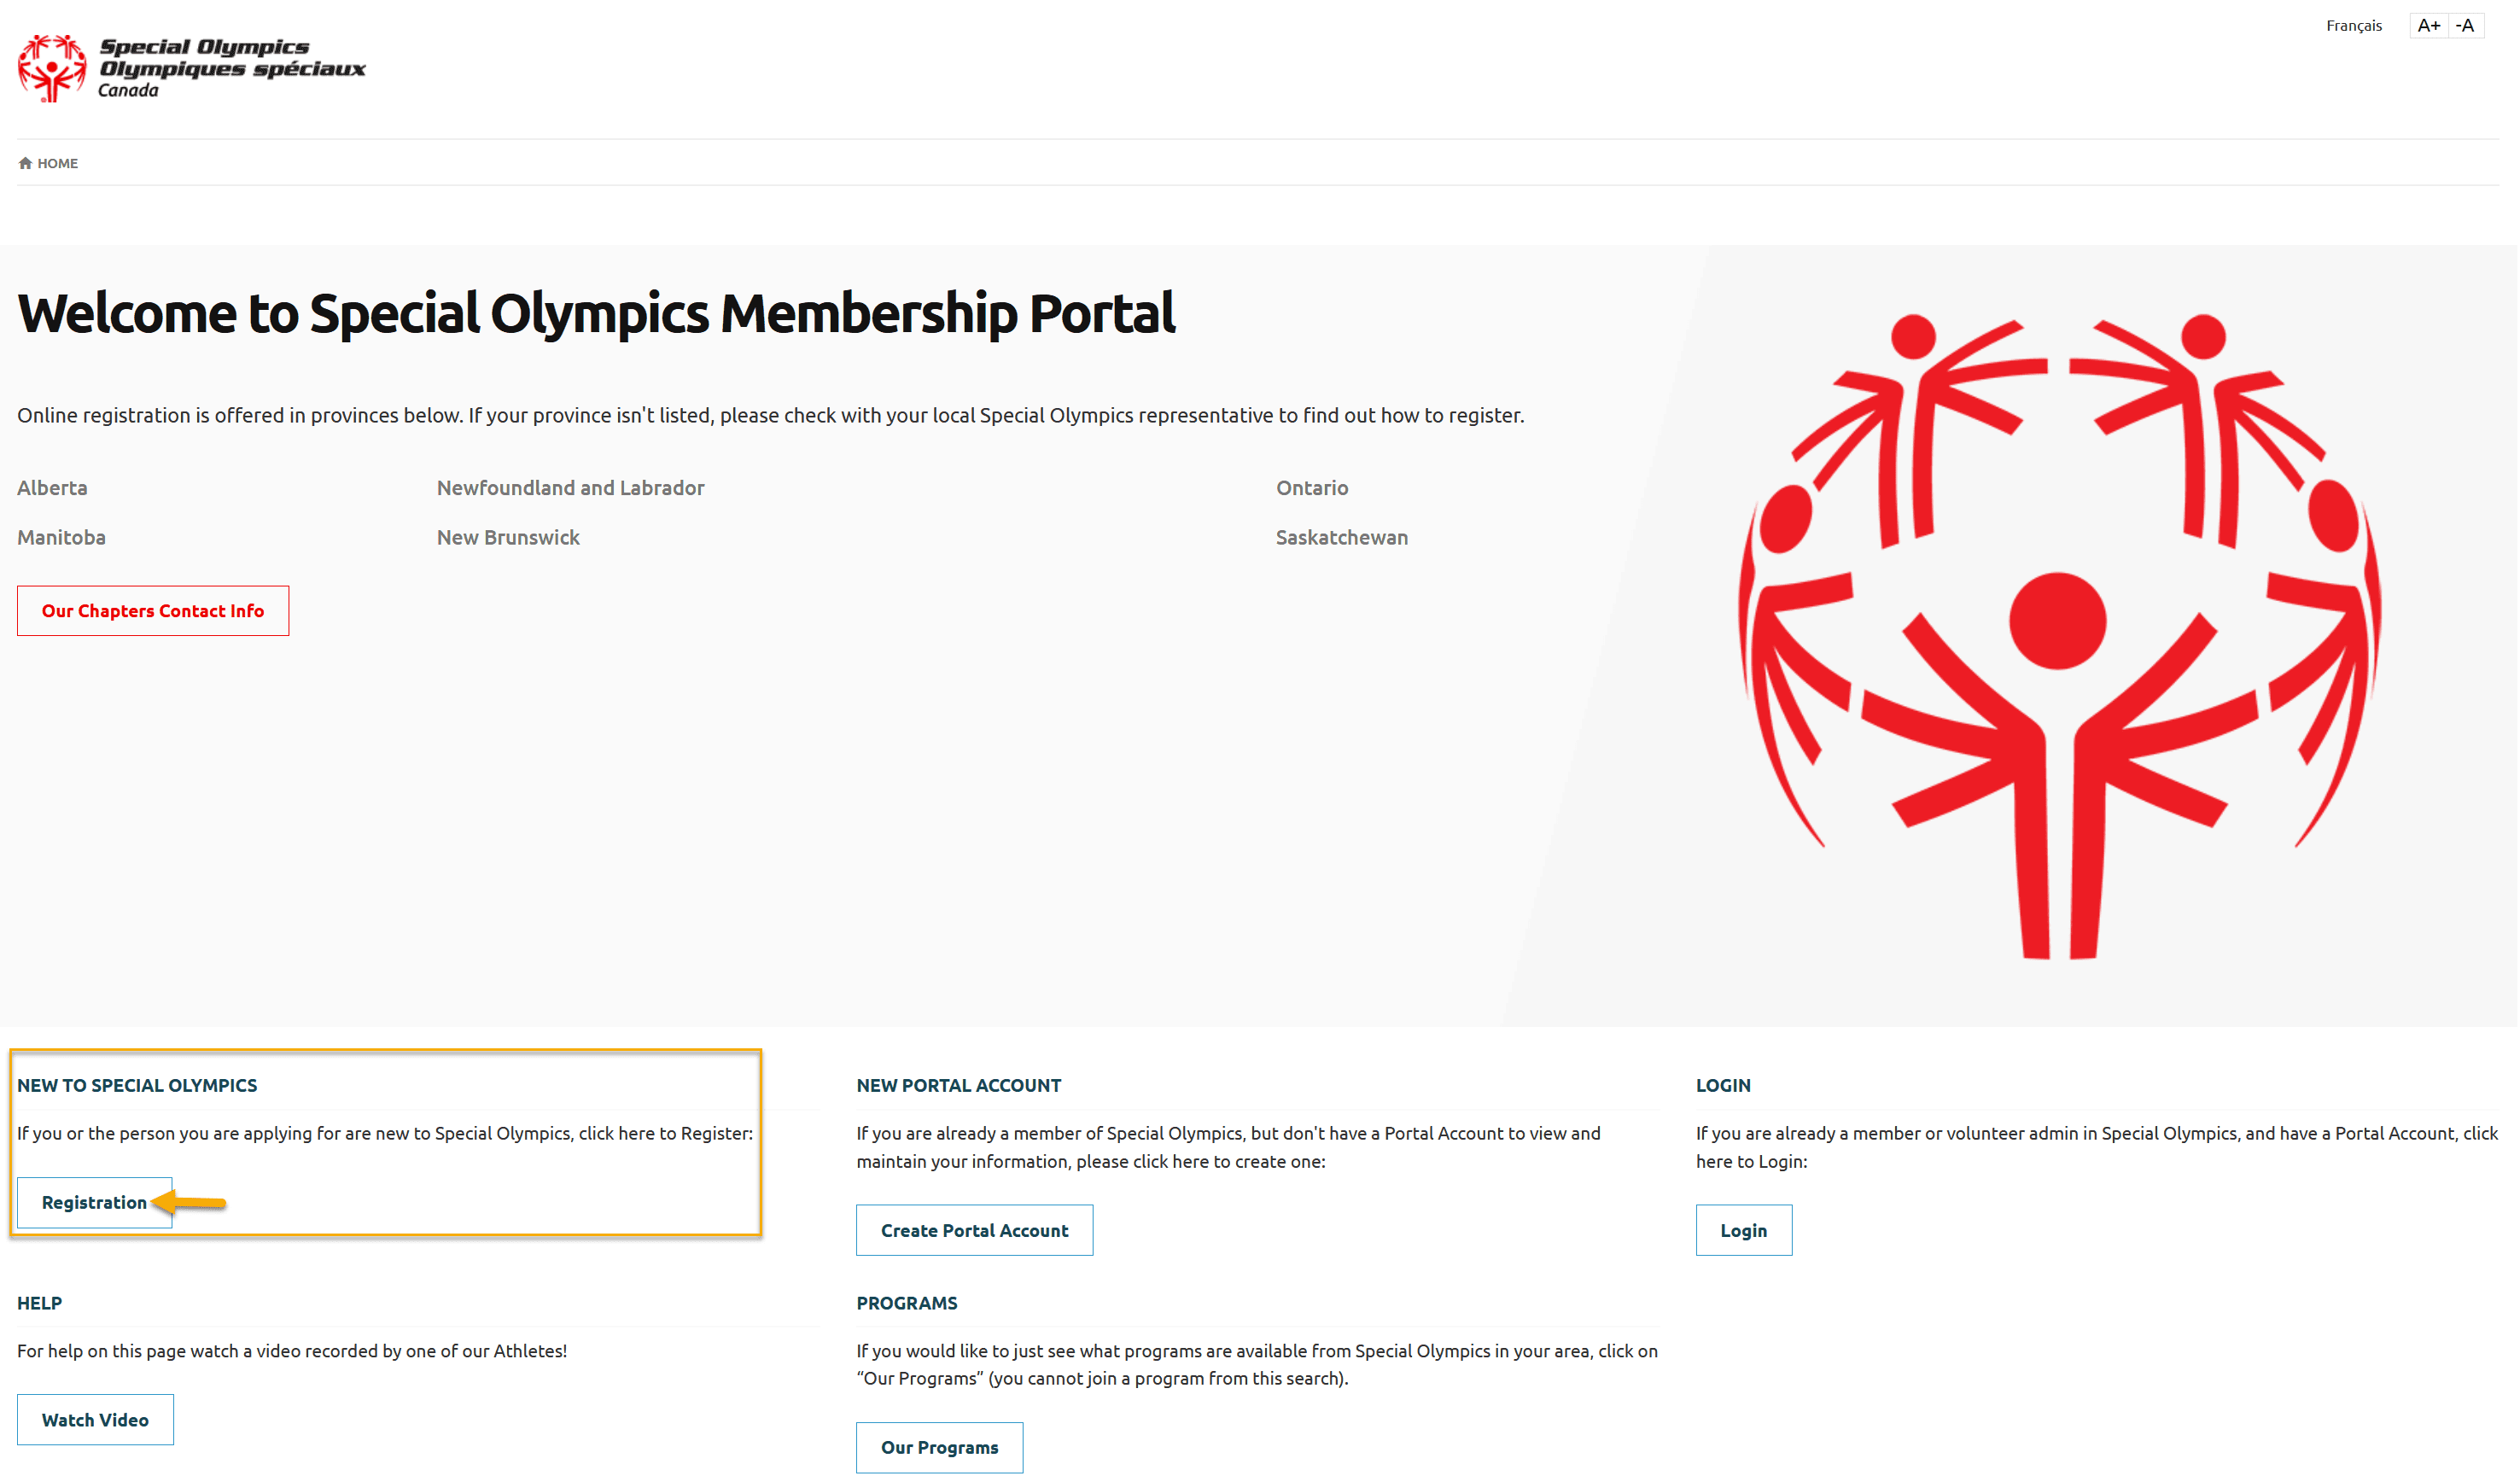
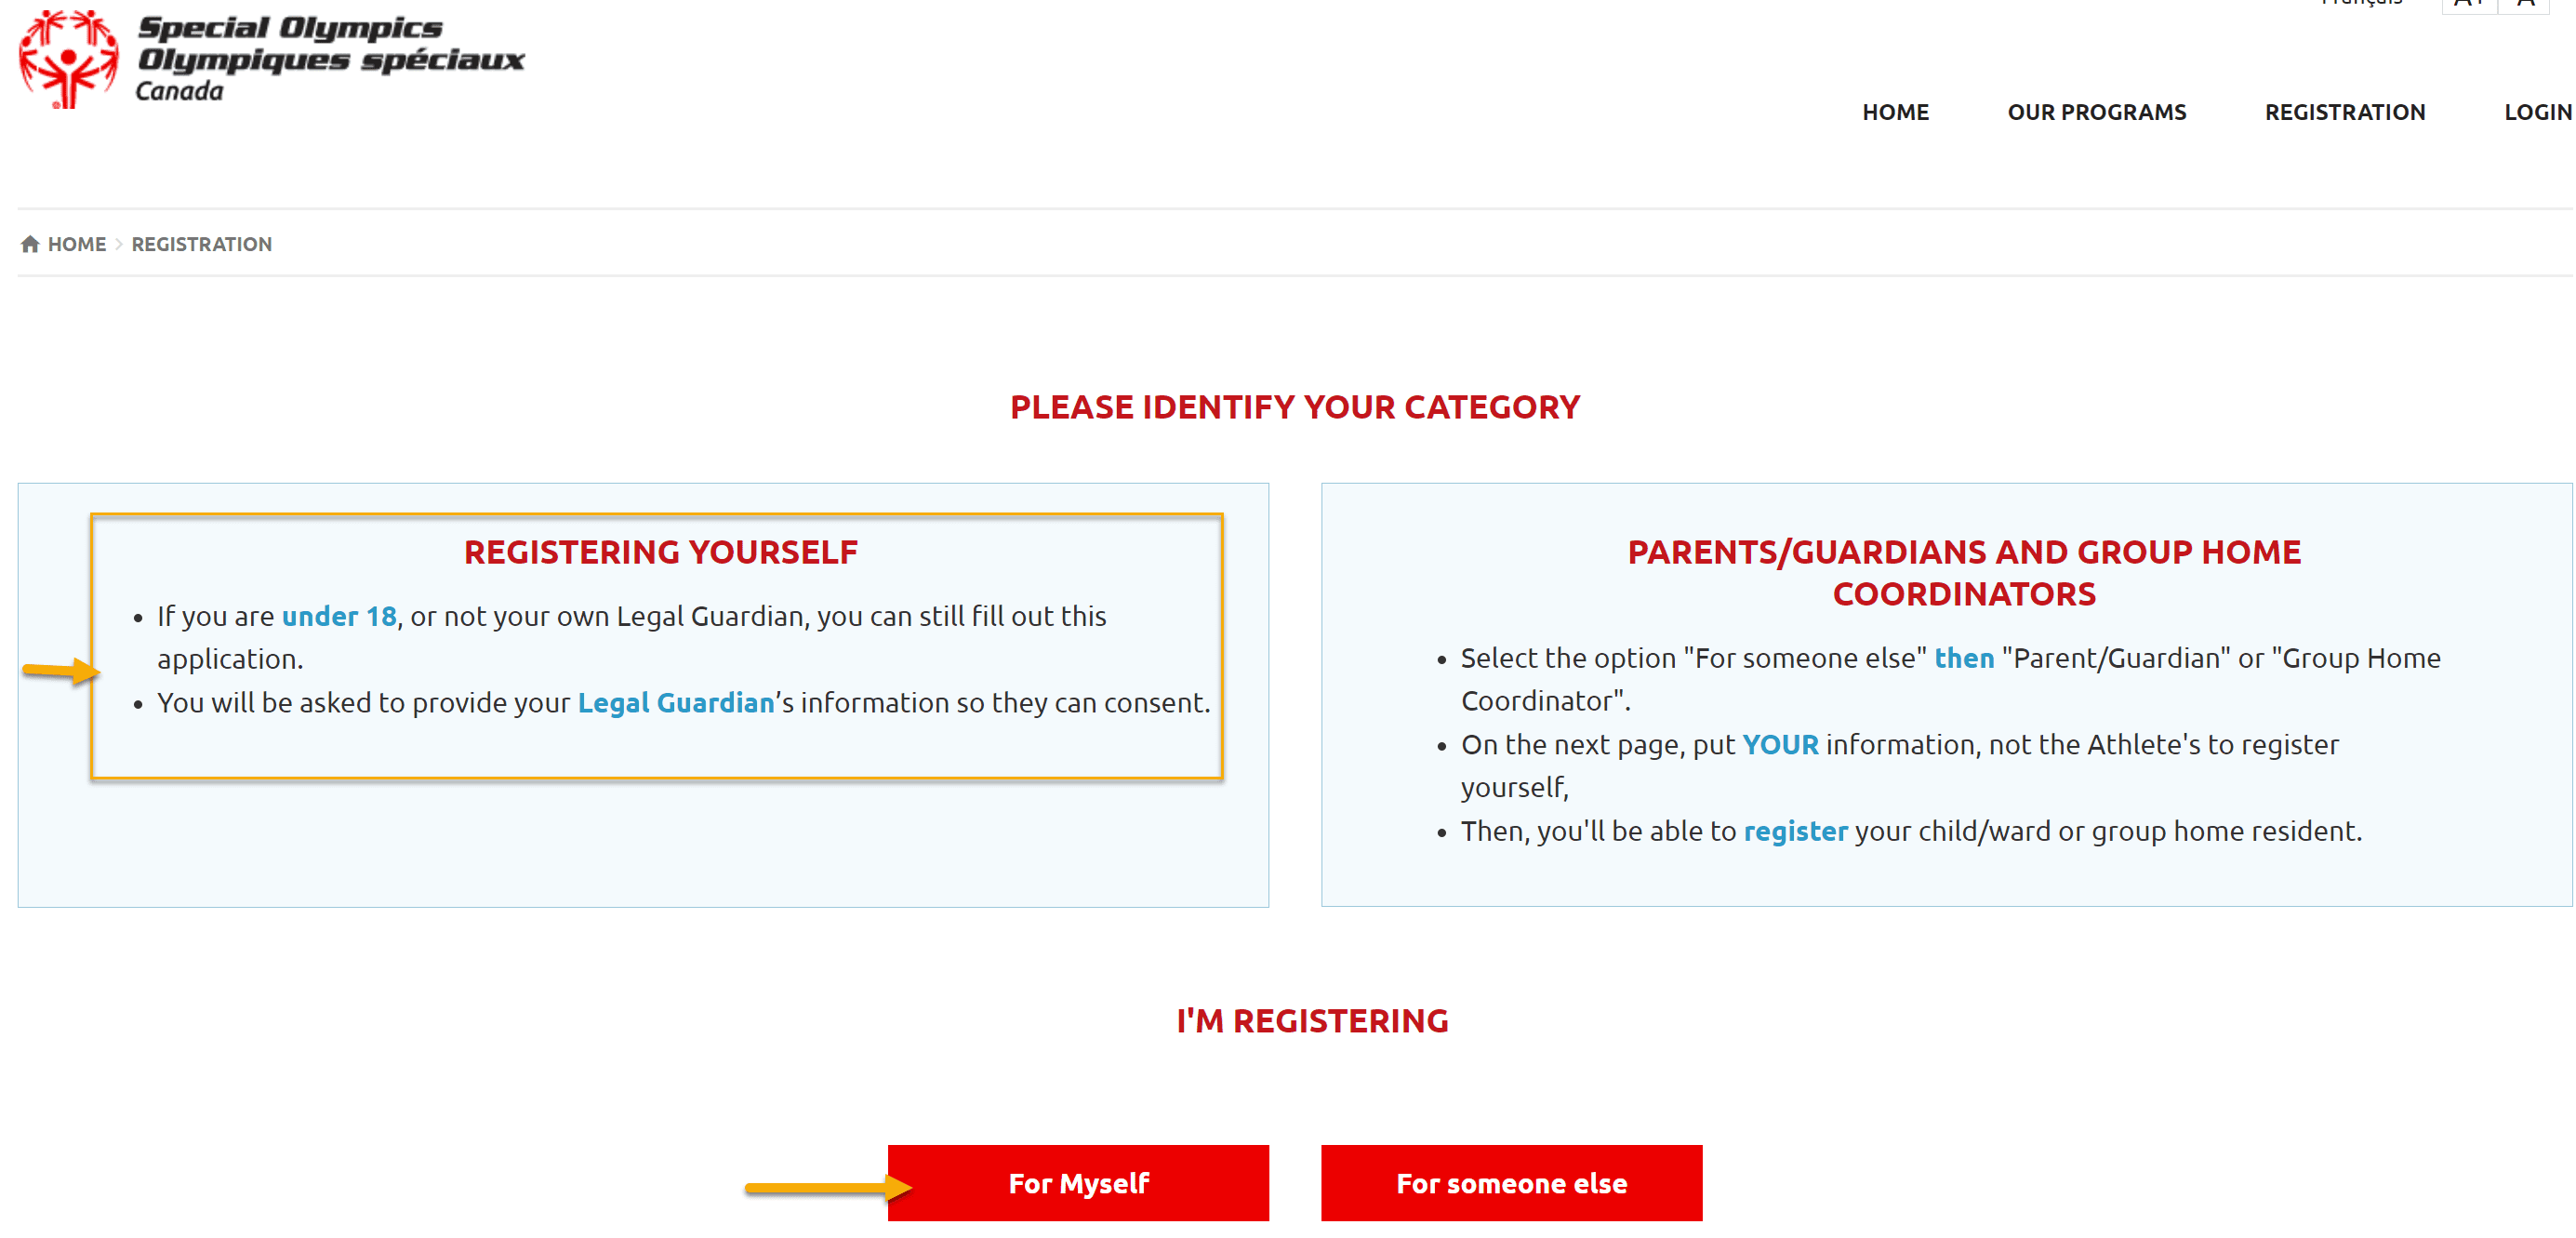
Please read carefully instruction given in the Registering Yourself
Select For Myself from the screen
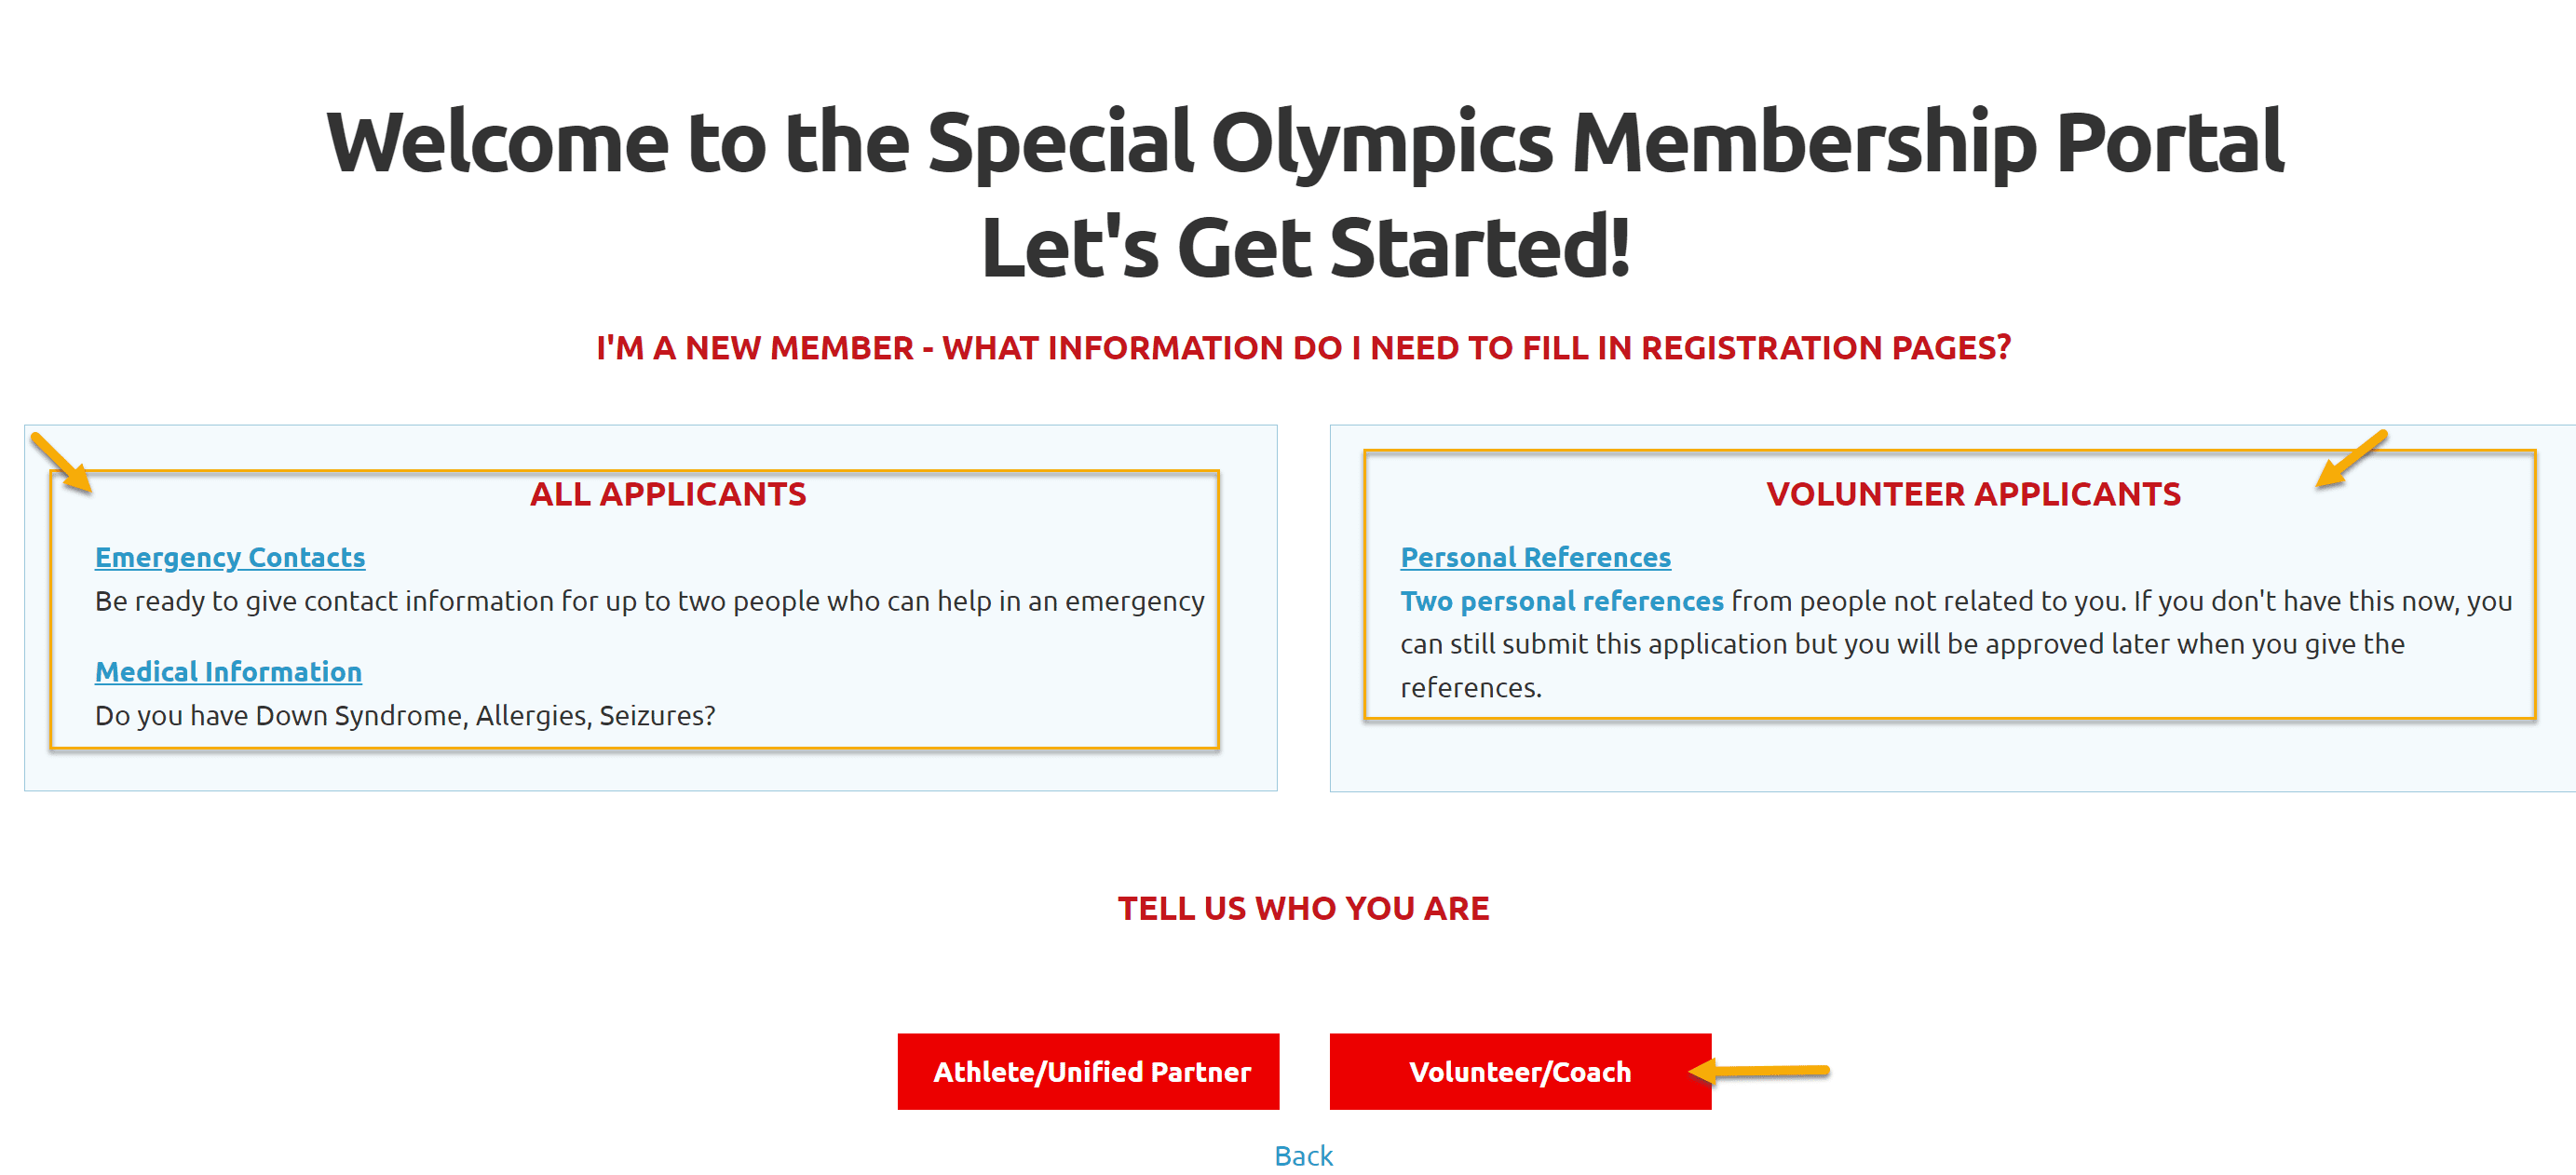
Read instructions for All Applicants & Volunteer Applicants
Select Volunteer/Coach from Let’s Get Started Screen
Your Information
Select SO Ontario from Province/Territory field drop-down
Fill out Your Information in four fields, First Name (your legal first name), Last Name, Date of Birth and Email Address.
Select Yes from Do you have Guardianship over yourself?
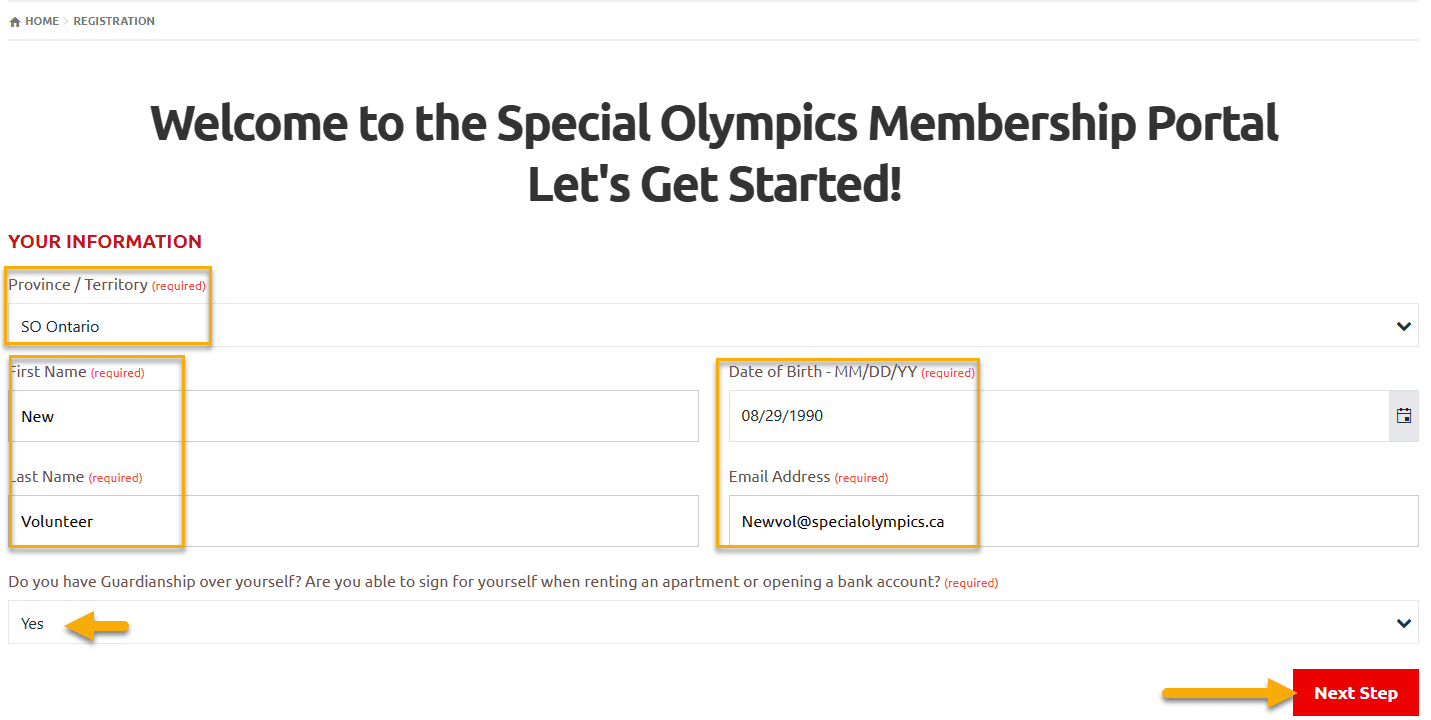
Click Next Step
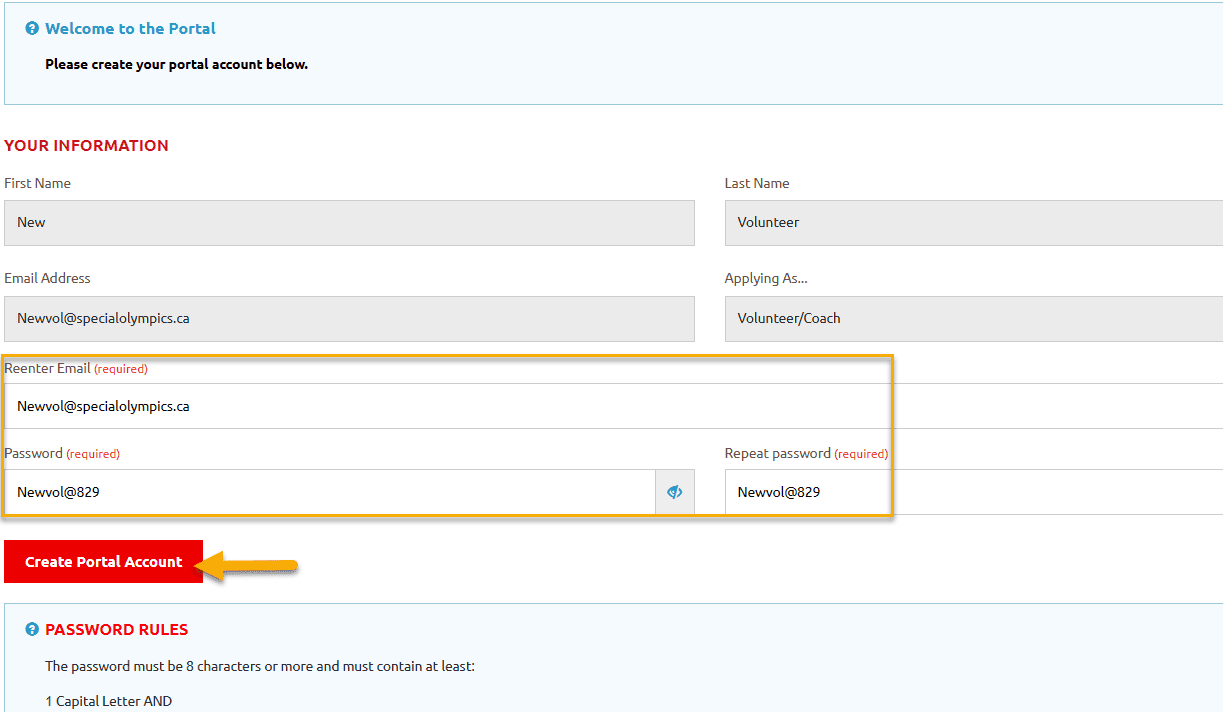
Create Portal Account
System did not find you as a registered member and welcoming you to create your portal account as a new member.
Enter your Email address in Reenter Email field and password in Password & Repeat Password fields.
Note: Follow the Password Rules to enter password. Click on Eye icon to see your password.
Click Create Portal Account
Now you have to complete all steps to submit your application
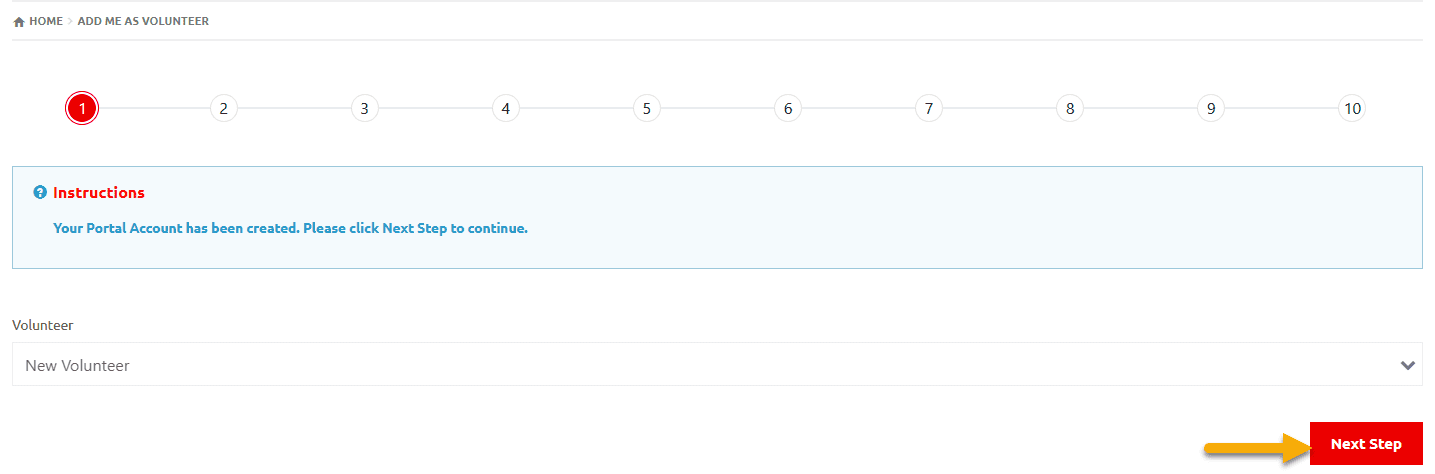
Step 1 – Success message of your Portal Account creation
You will see your name in Volunteer field
Click on Next Step
Step 2 – Program Search and Club/Program Selection
In Program Search window, Search/Select Community in which you want to find Sport clubs/Programs
Note: You can select Sport to find Clubs/Programs only for that particular sport
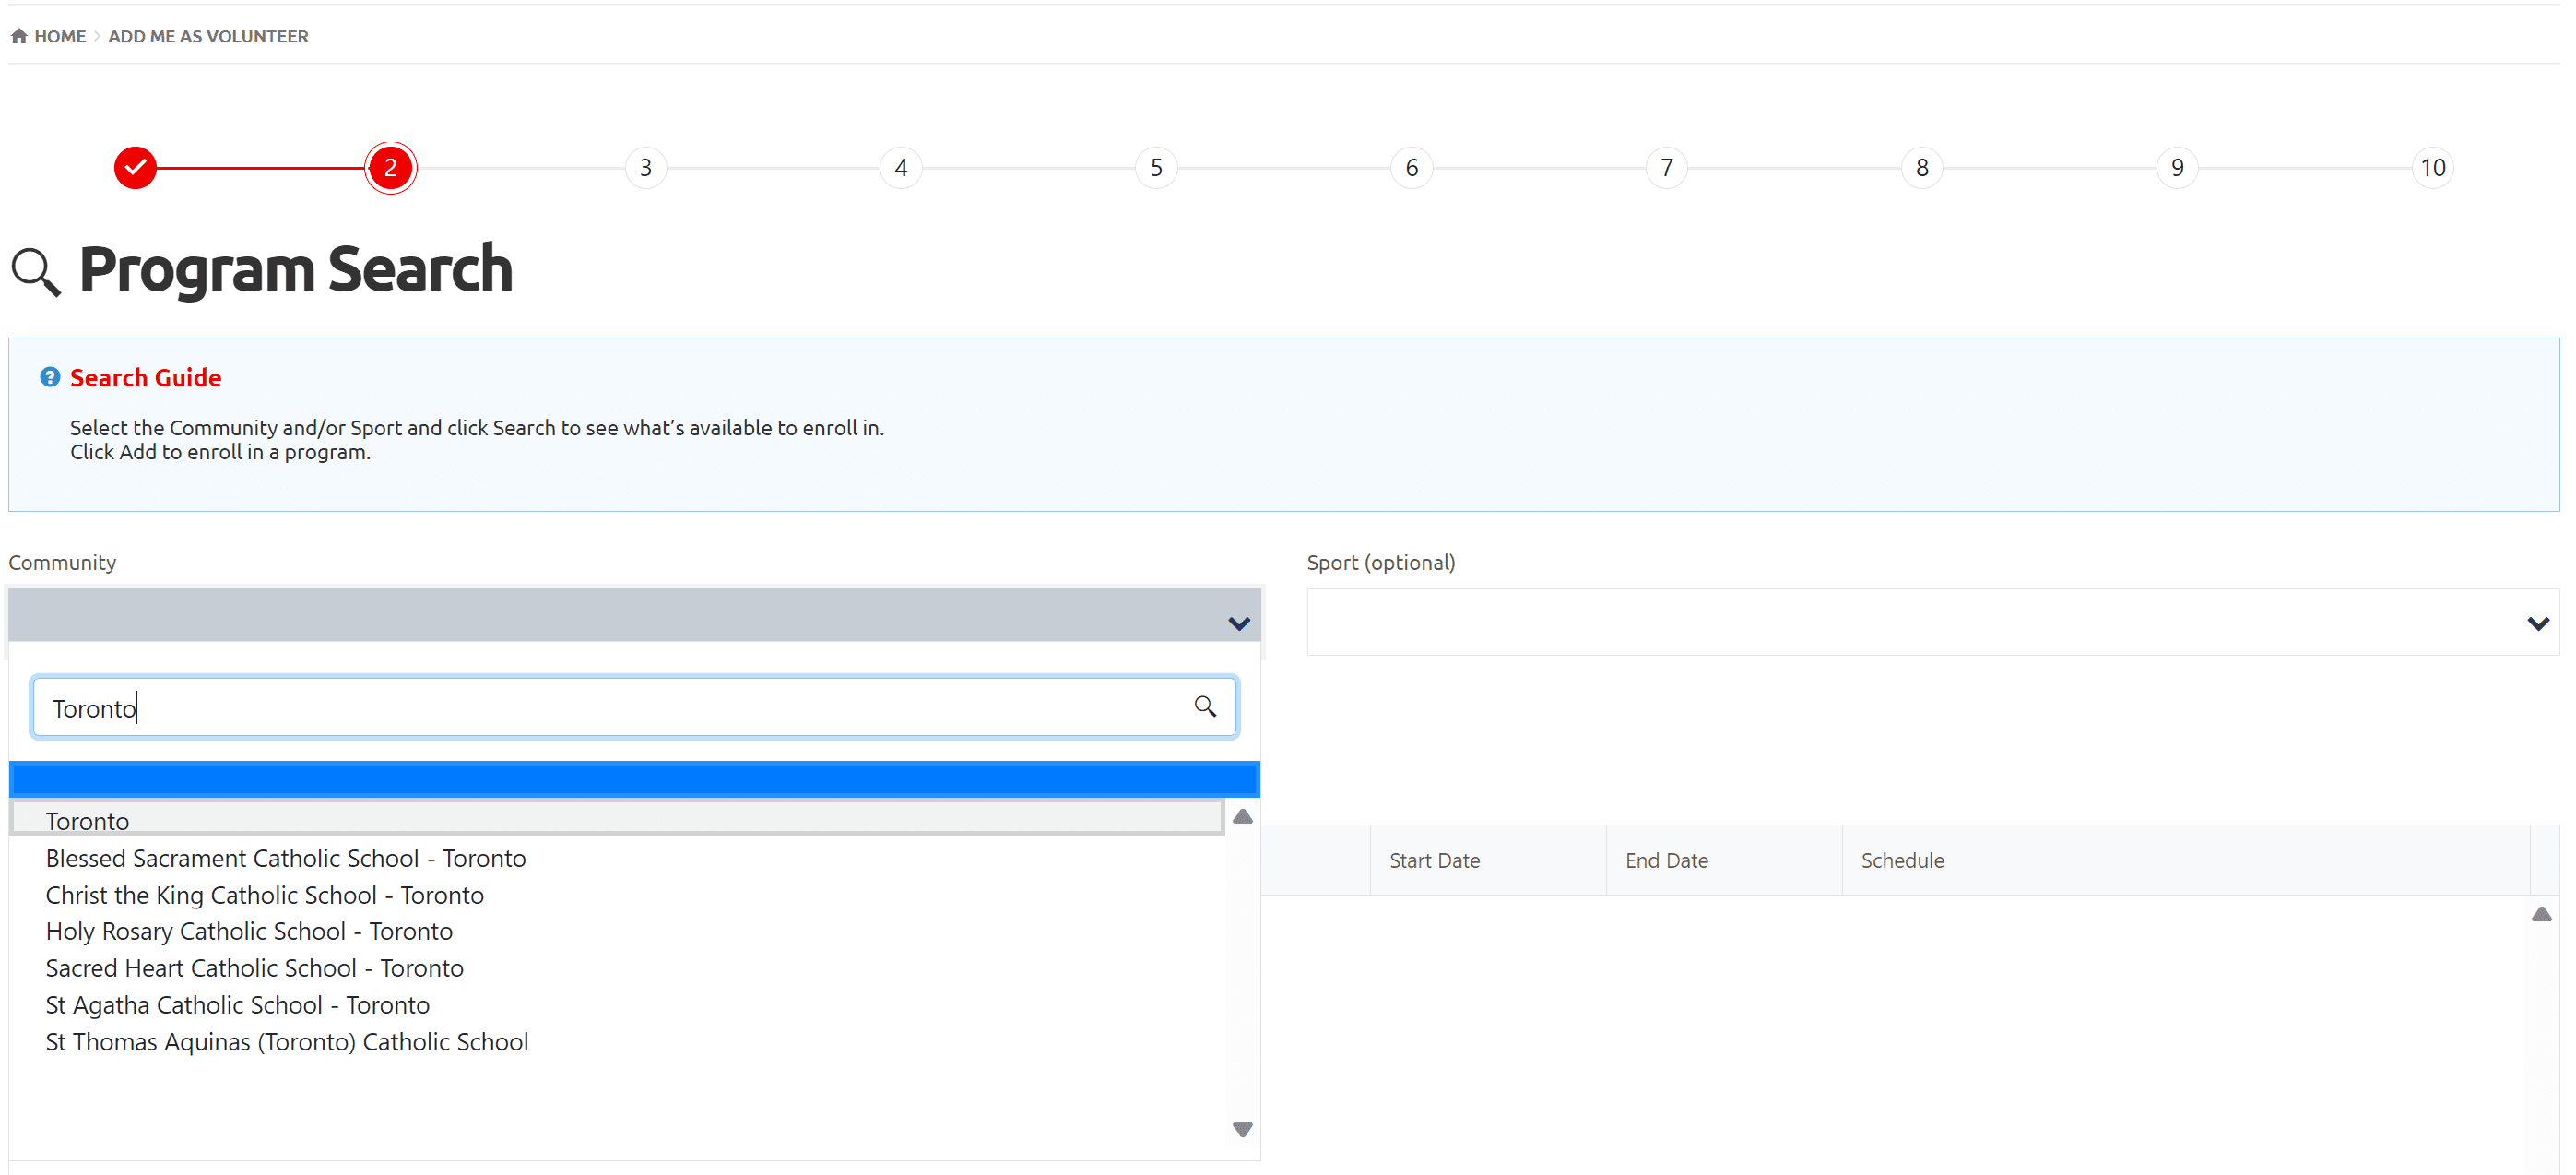
After Community selection
Click on Search
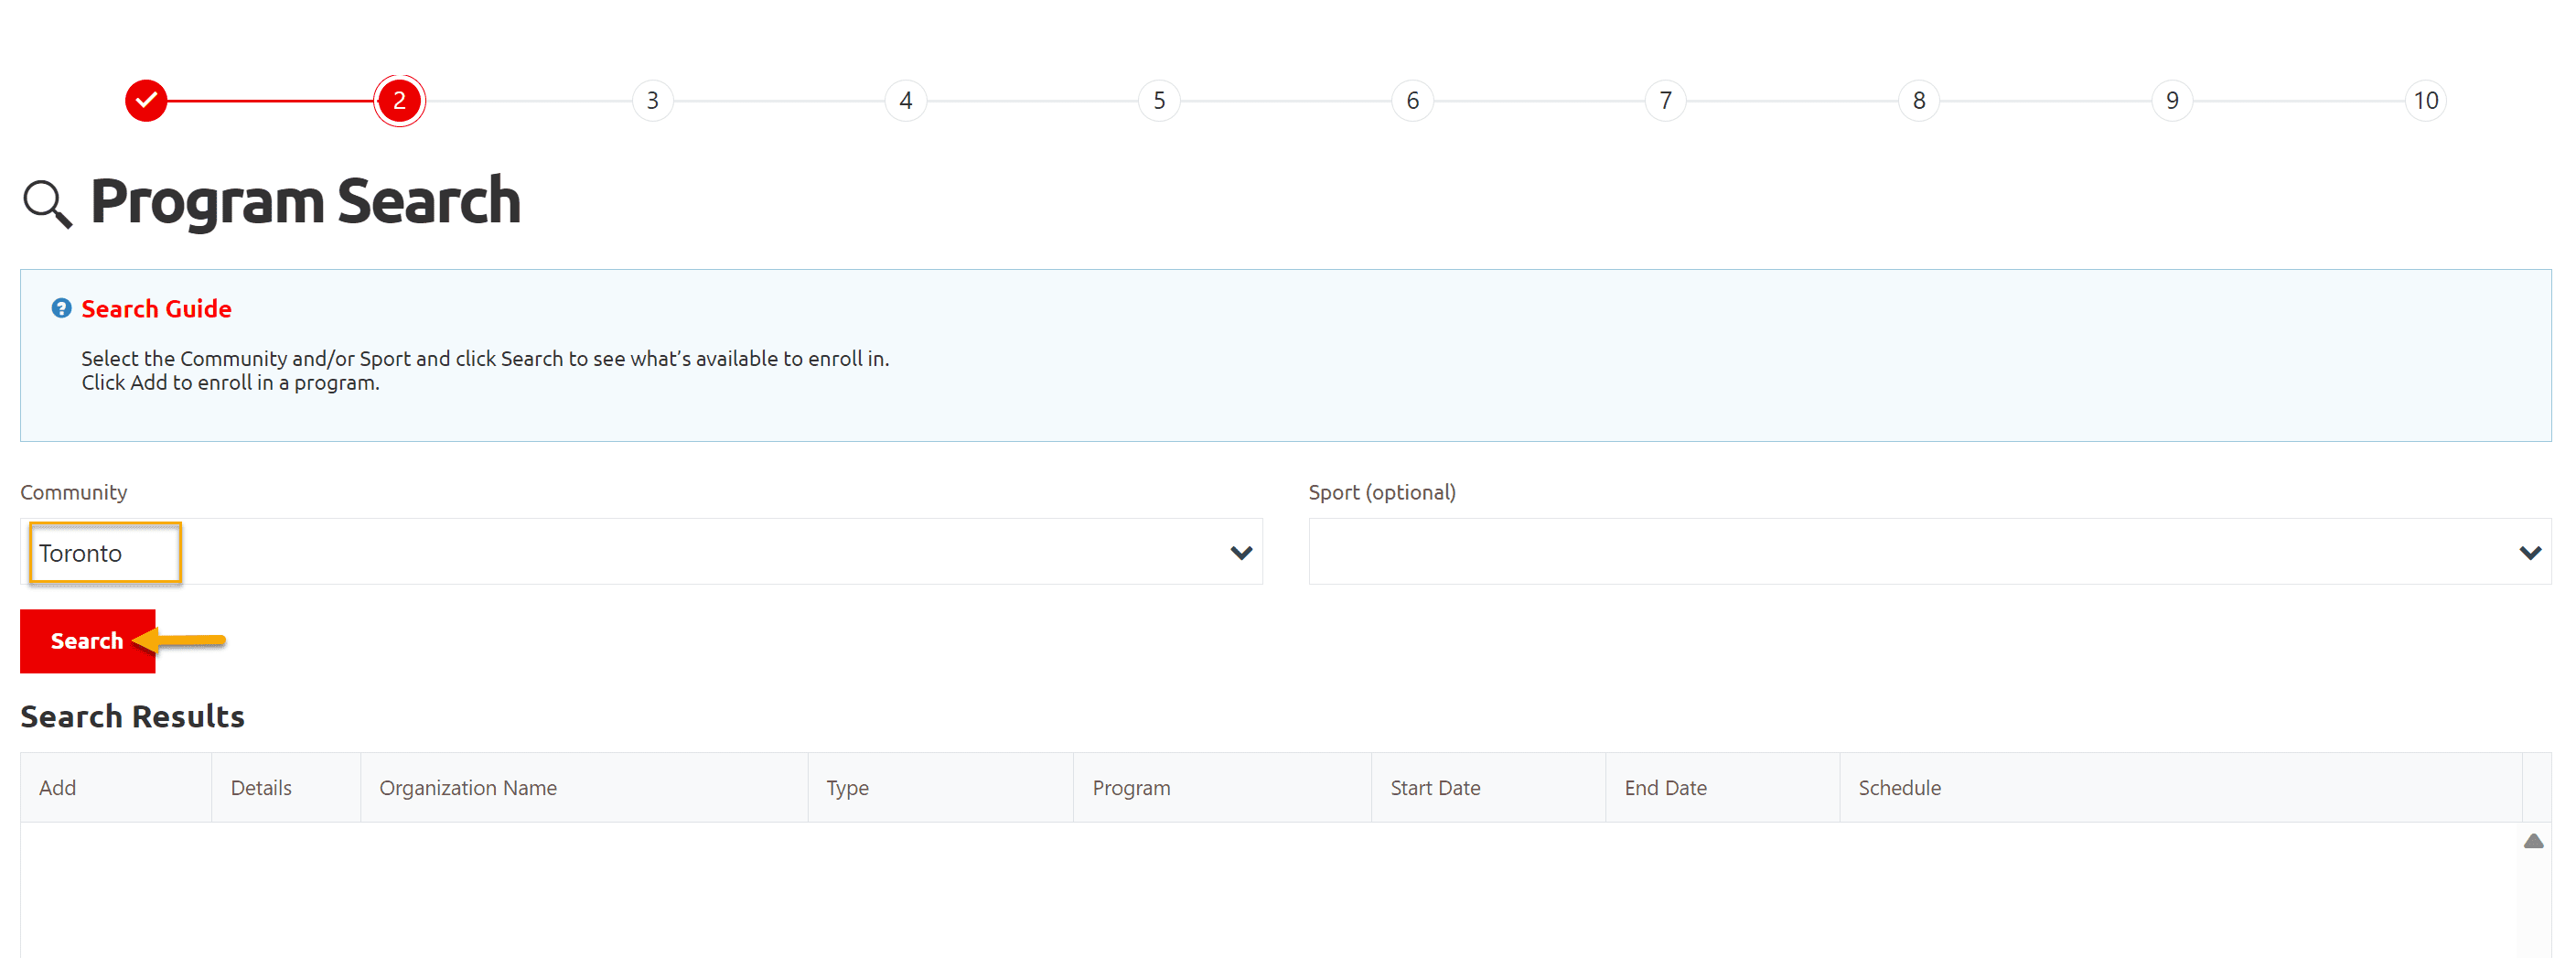
You will get list of programs which are currently running in this community
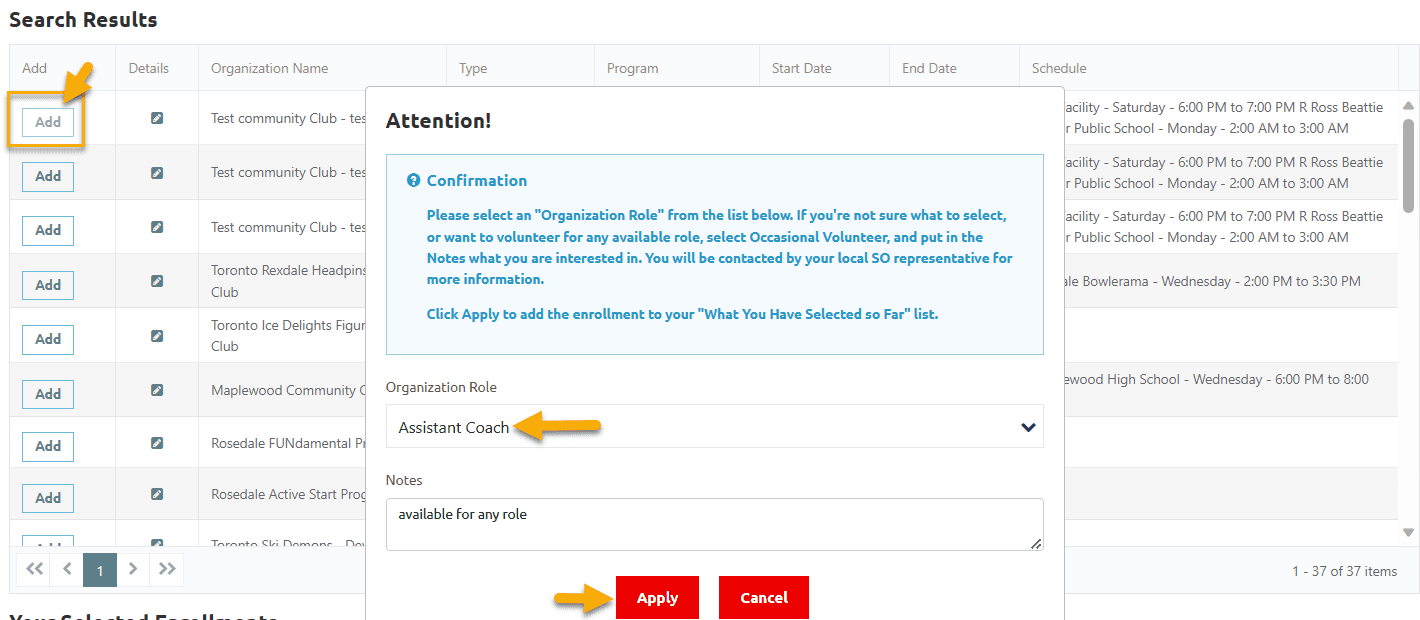
Click Add to the club you wish to enroll in Search Results window
A pop up window will open to select your role in club.
Select appropriate role from Organizational Role field. If you do not find role you want to have as volunteer, add a note in note field.
Add note in Note field if any.
Click Apply to save and close this pop up window.
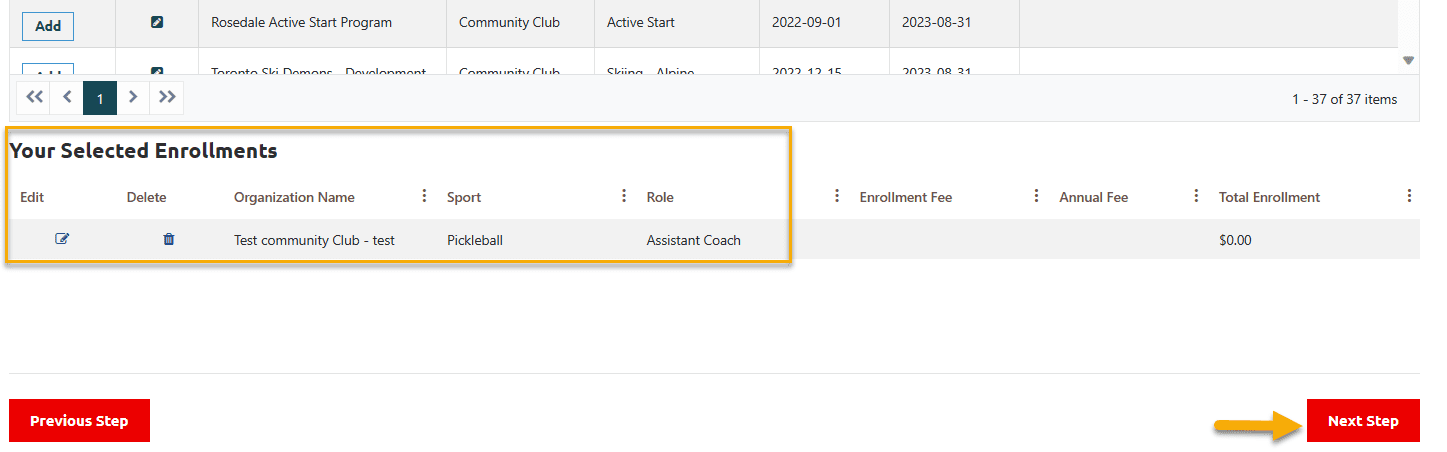
You will see Program & your role in Your Selected Enrollments section
To review enrollment detail, click on Edit button, a window will open with your enrollment details.
If you have selected this club by mistake and want to enroll in different club, click on Delete button to delete this enrollment. Follow the above mentioned step to enroll in club you wish for.
After reviewing your enrollment Click on Next Step
Click on Next Step
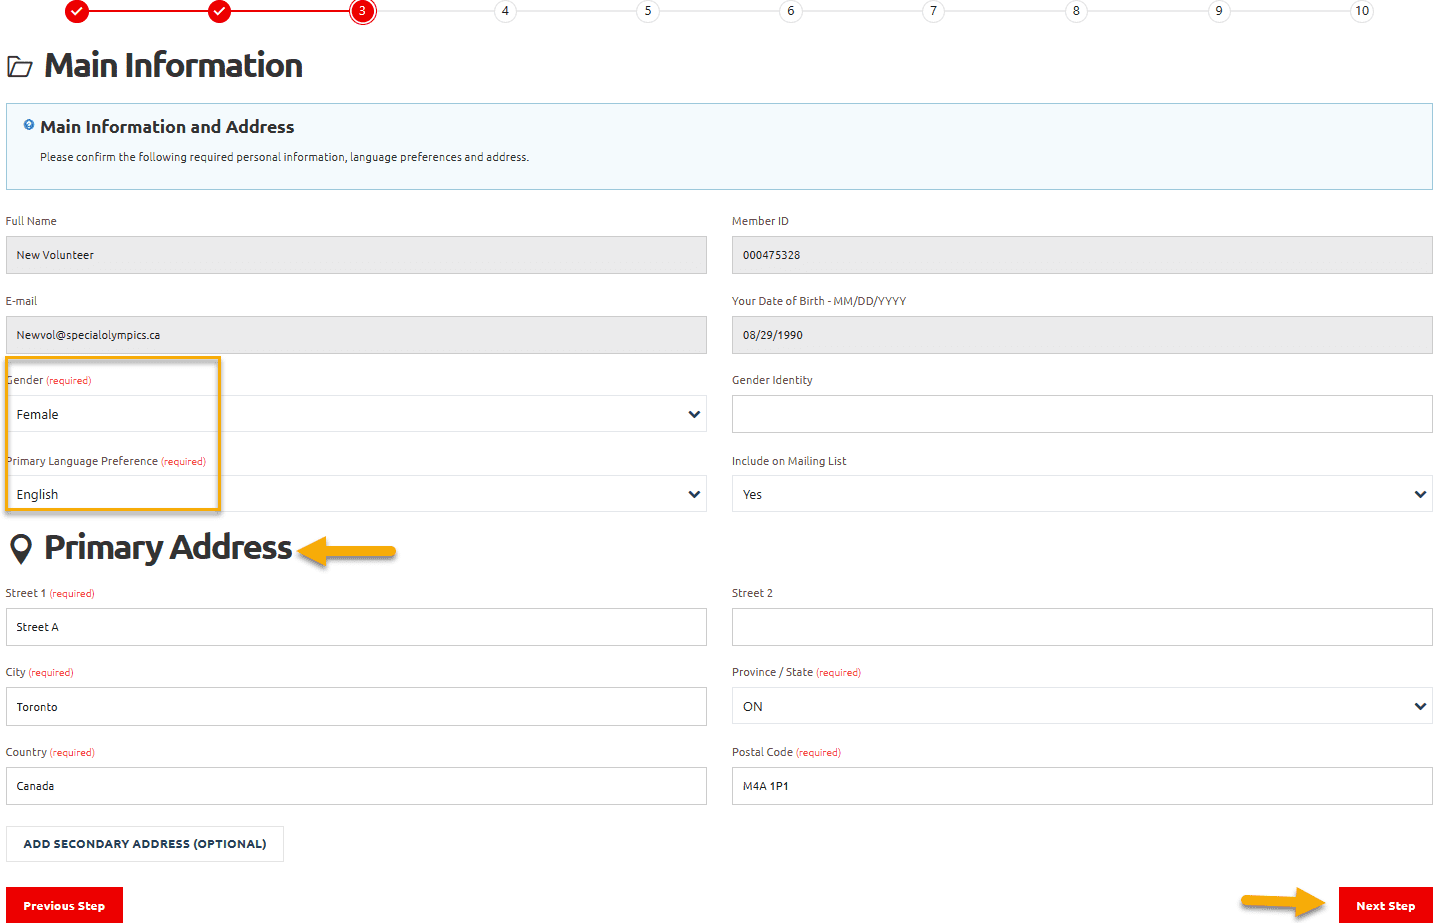
Step 3 – Main Information
Please fill in all Required fields
Add Primary Address
Click Next Step
Note: if you have secondary address and want to add it, Click on Add Secondary Address, add info and Submit.
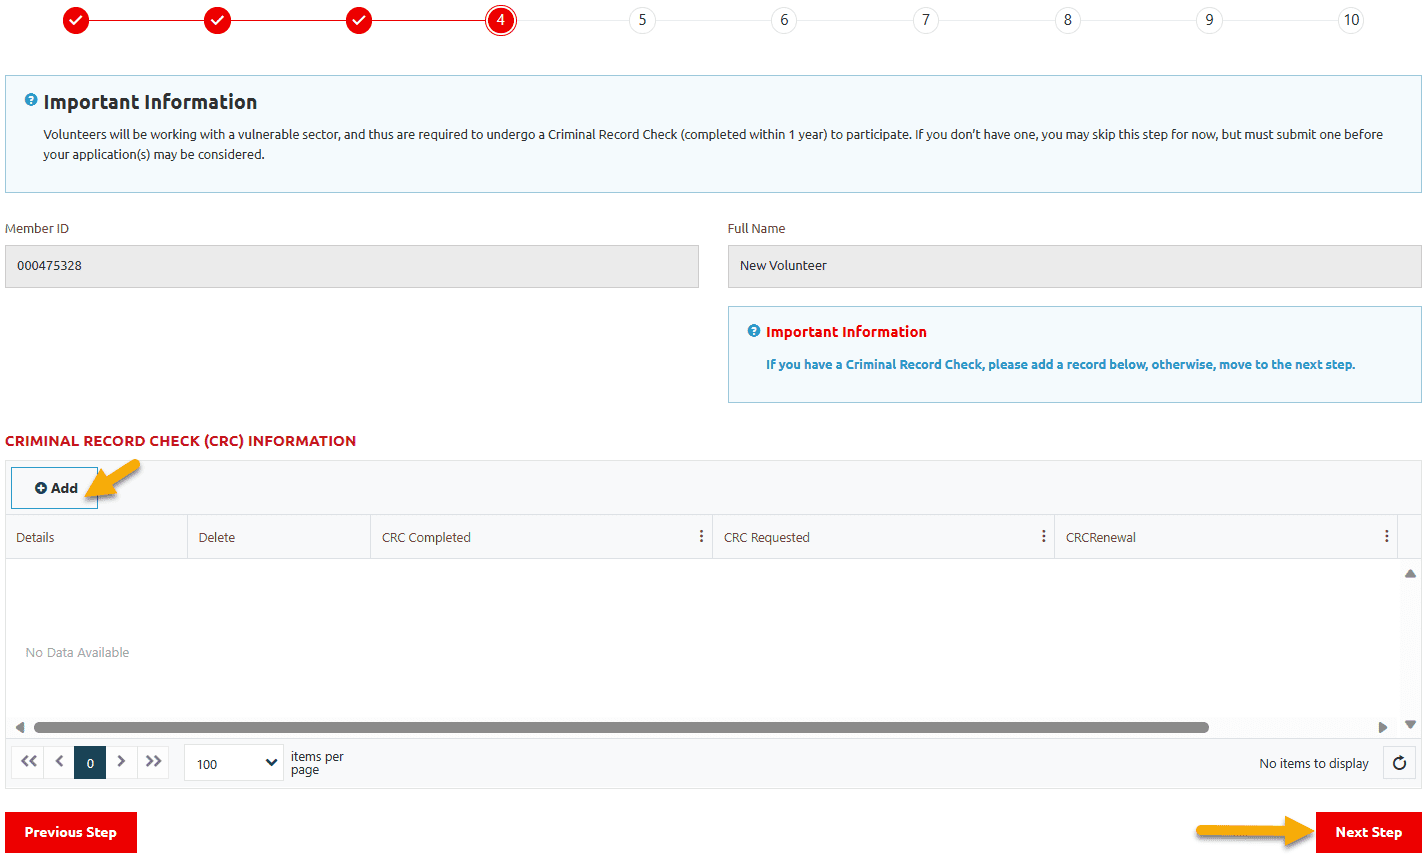
Step 4 – Criminal Record Check Information
In Criminal Record (CRC) Information window, Click +Add and follow the instructions given on the screen to upload copy of police check
- If you have current complete police check (current means not older than a year, complete means Criminal +VSS) and have PDF copy.
- You can upload E-police checks (some police services issue E-copy of police check result)
If you do not have Police Check at this moment, click on Next Step, it can be uploaded later anytime after submitting you application.
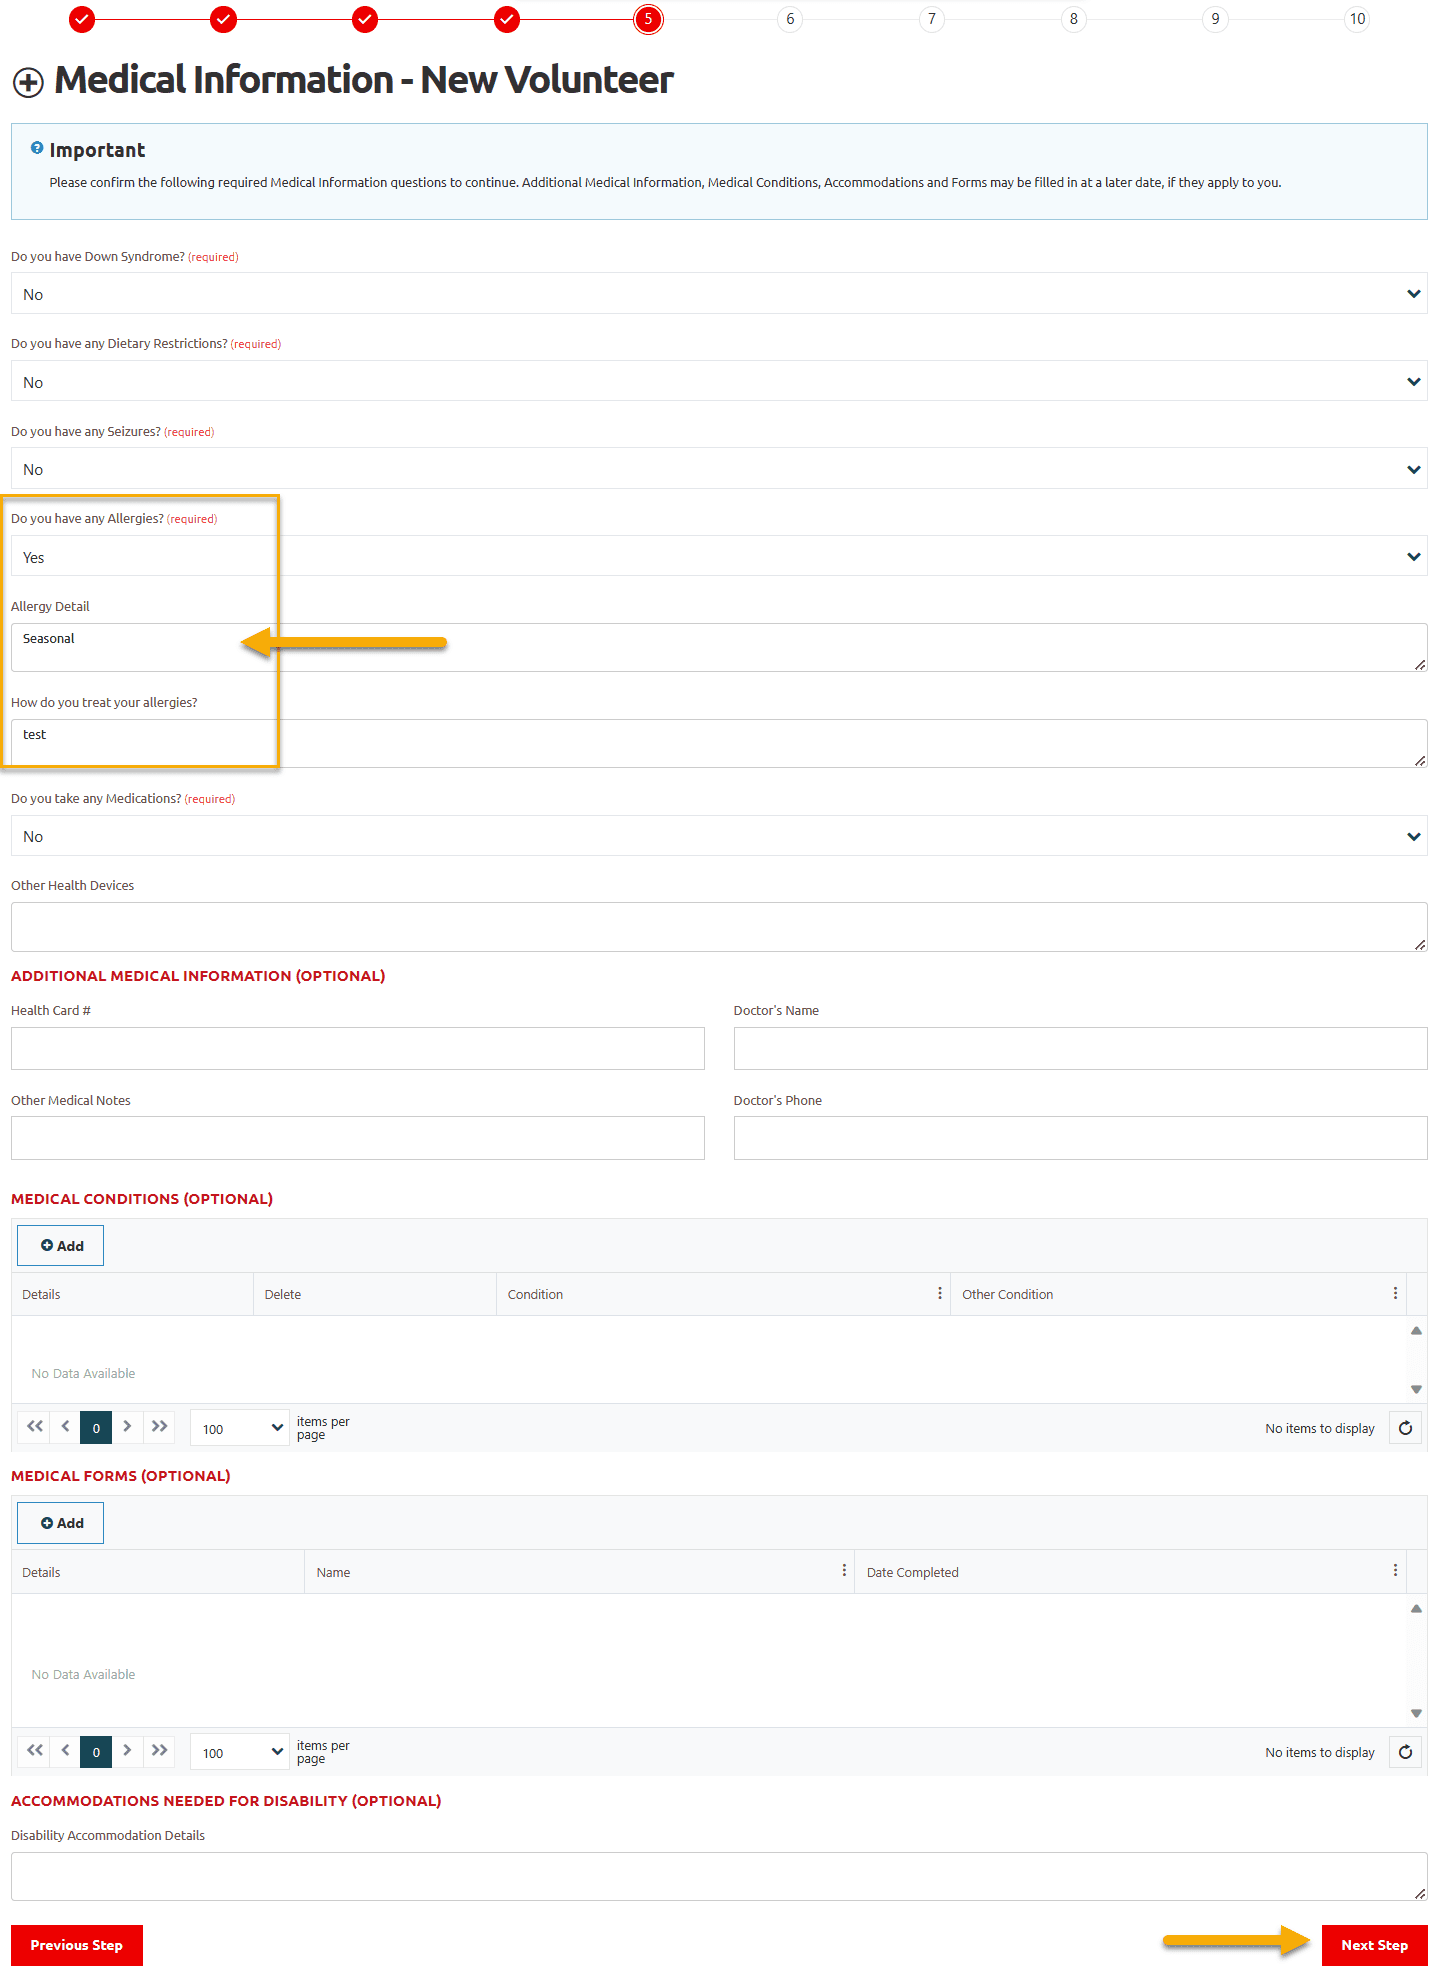
Step 5 – Medical information
Fill out all required fields on this screen.
If your answer for any question will be Yes, more fields will appear to input details related to that question.
You can add your Medical Condition if any, by clicking on +Add, a new window will popup, select appropriate option and Submit to save it.
Then click on Next Step
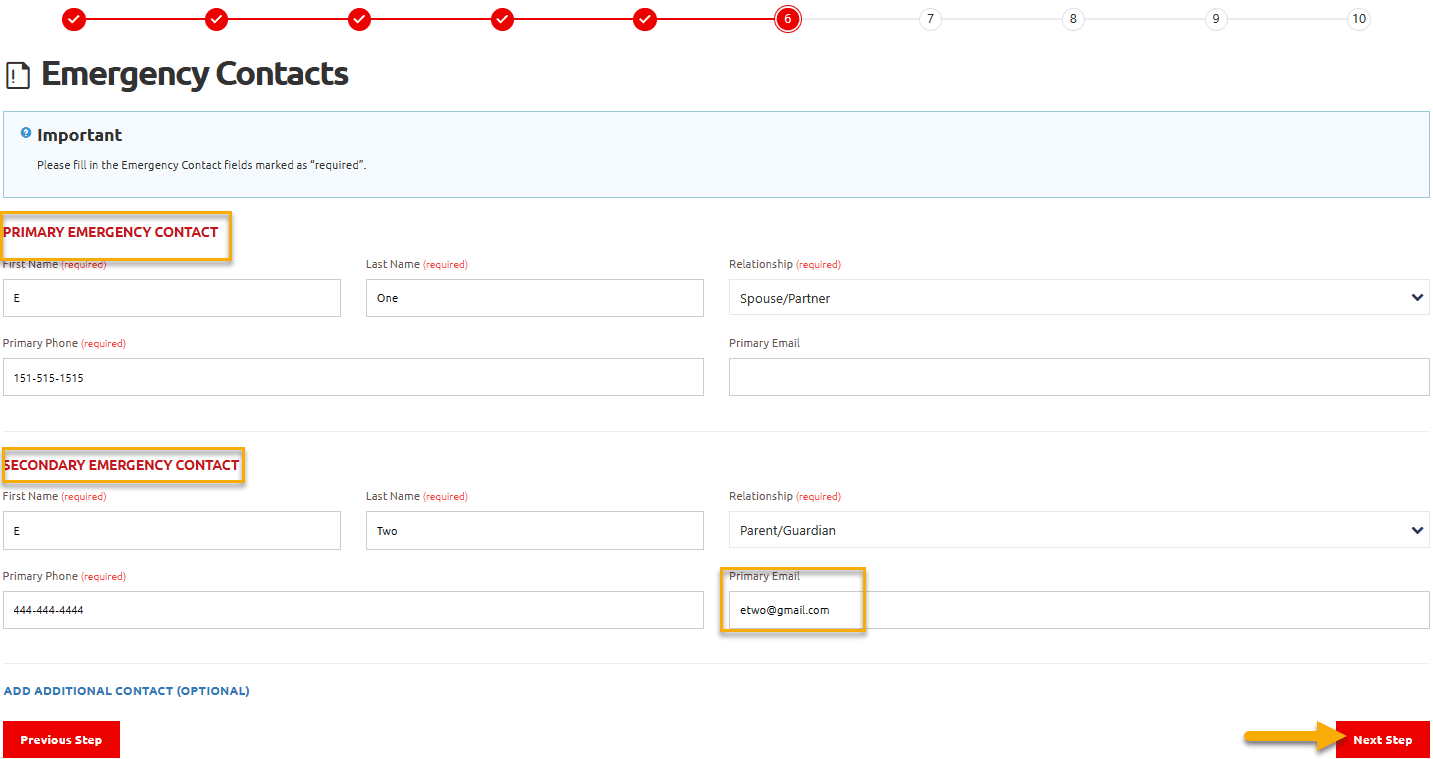
Step 6 – Emergency Contacts
You must have to provide two Emergency Contacts information.
Enter Required fields and any other field for both contacts
Click on Next Step
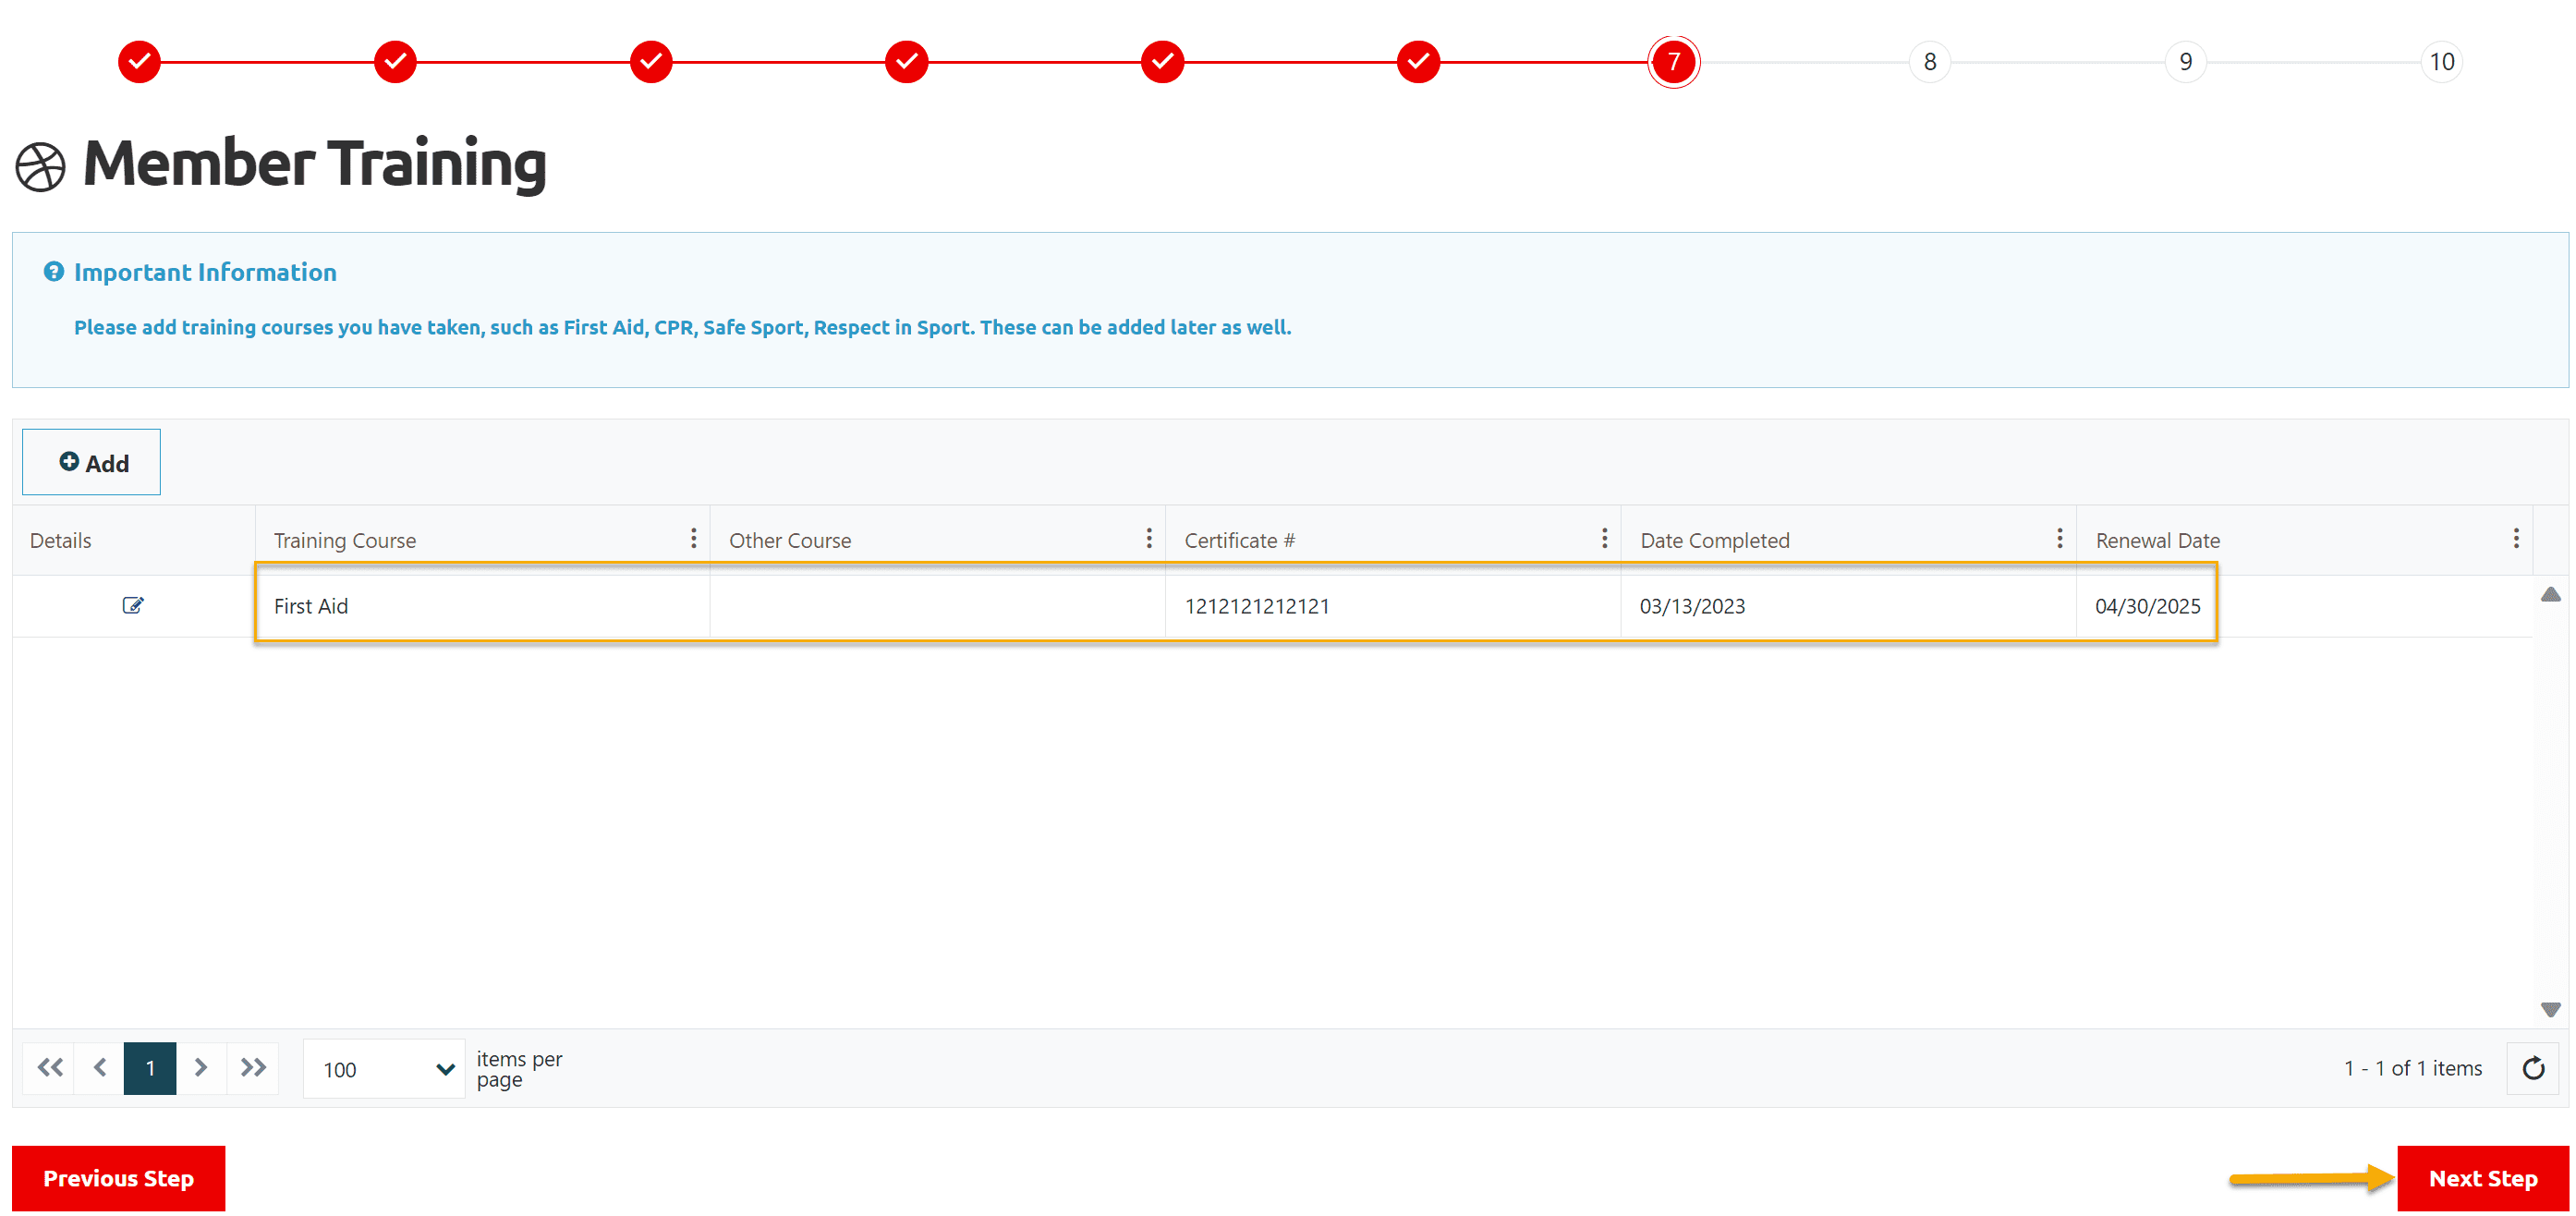
Step 7 – Member Training
If you have not taken any training course, Click on Next Step
OR
Click +Add to add info of the courses you have taken from the list provided in the pop up window.

If course name is not in the list, Select Other Course, Other Course field will be enabled to enter the Course Name.
Add date completed & renewal date if any and Submit
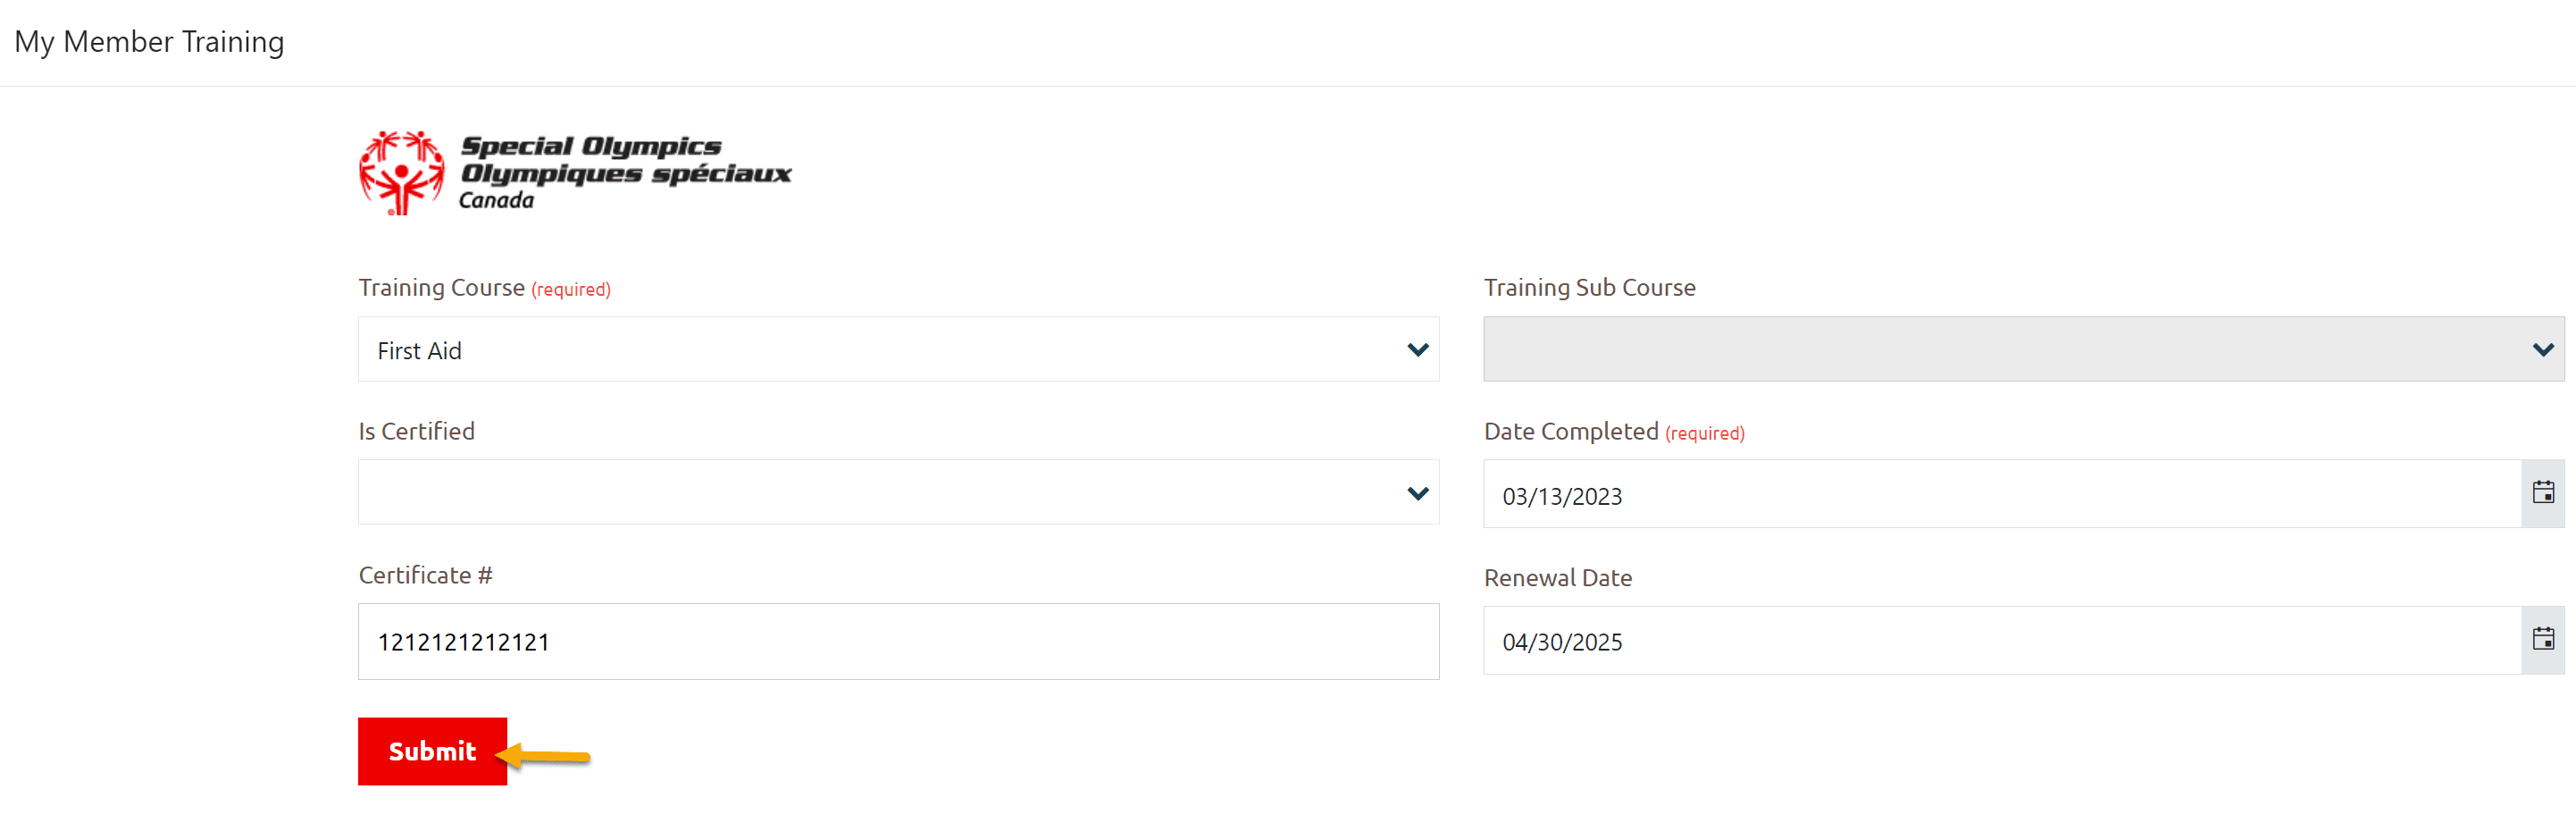
Click Next Step
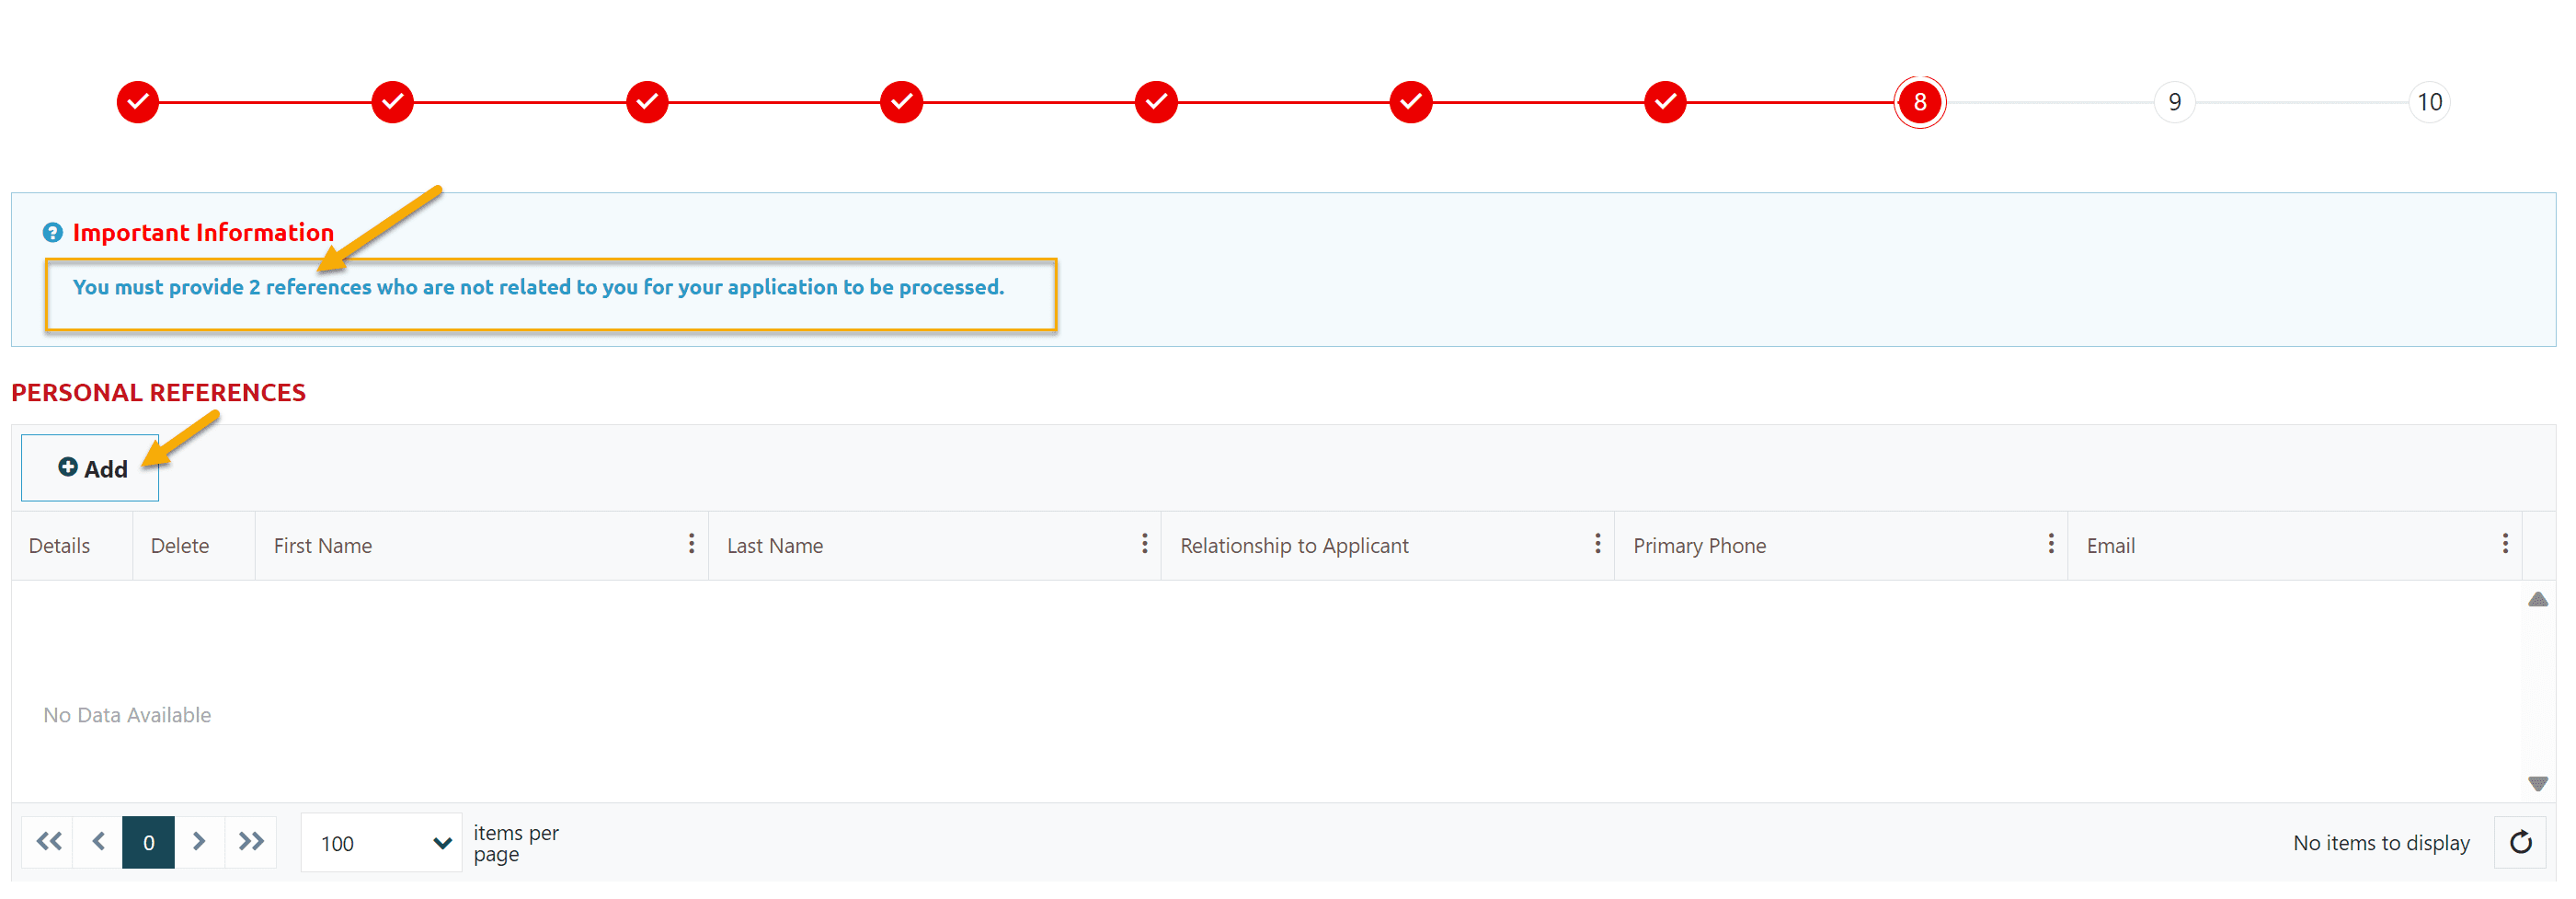
Step 8 – Personal References
You MUST have to provide two non-related references information in Personal References section. Click Add to enter the information.
Click Add to enter the information
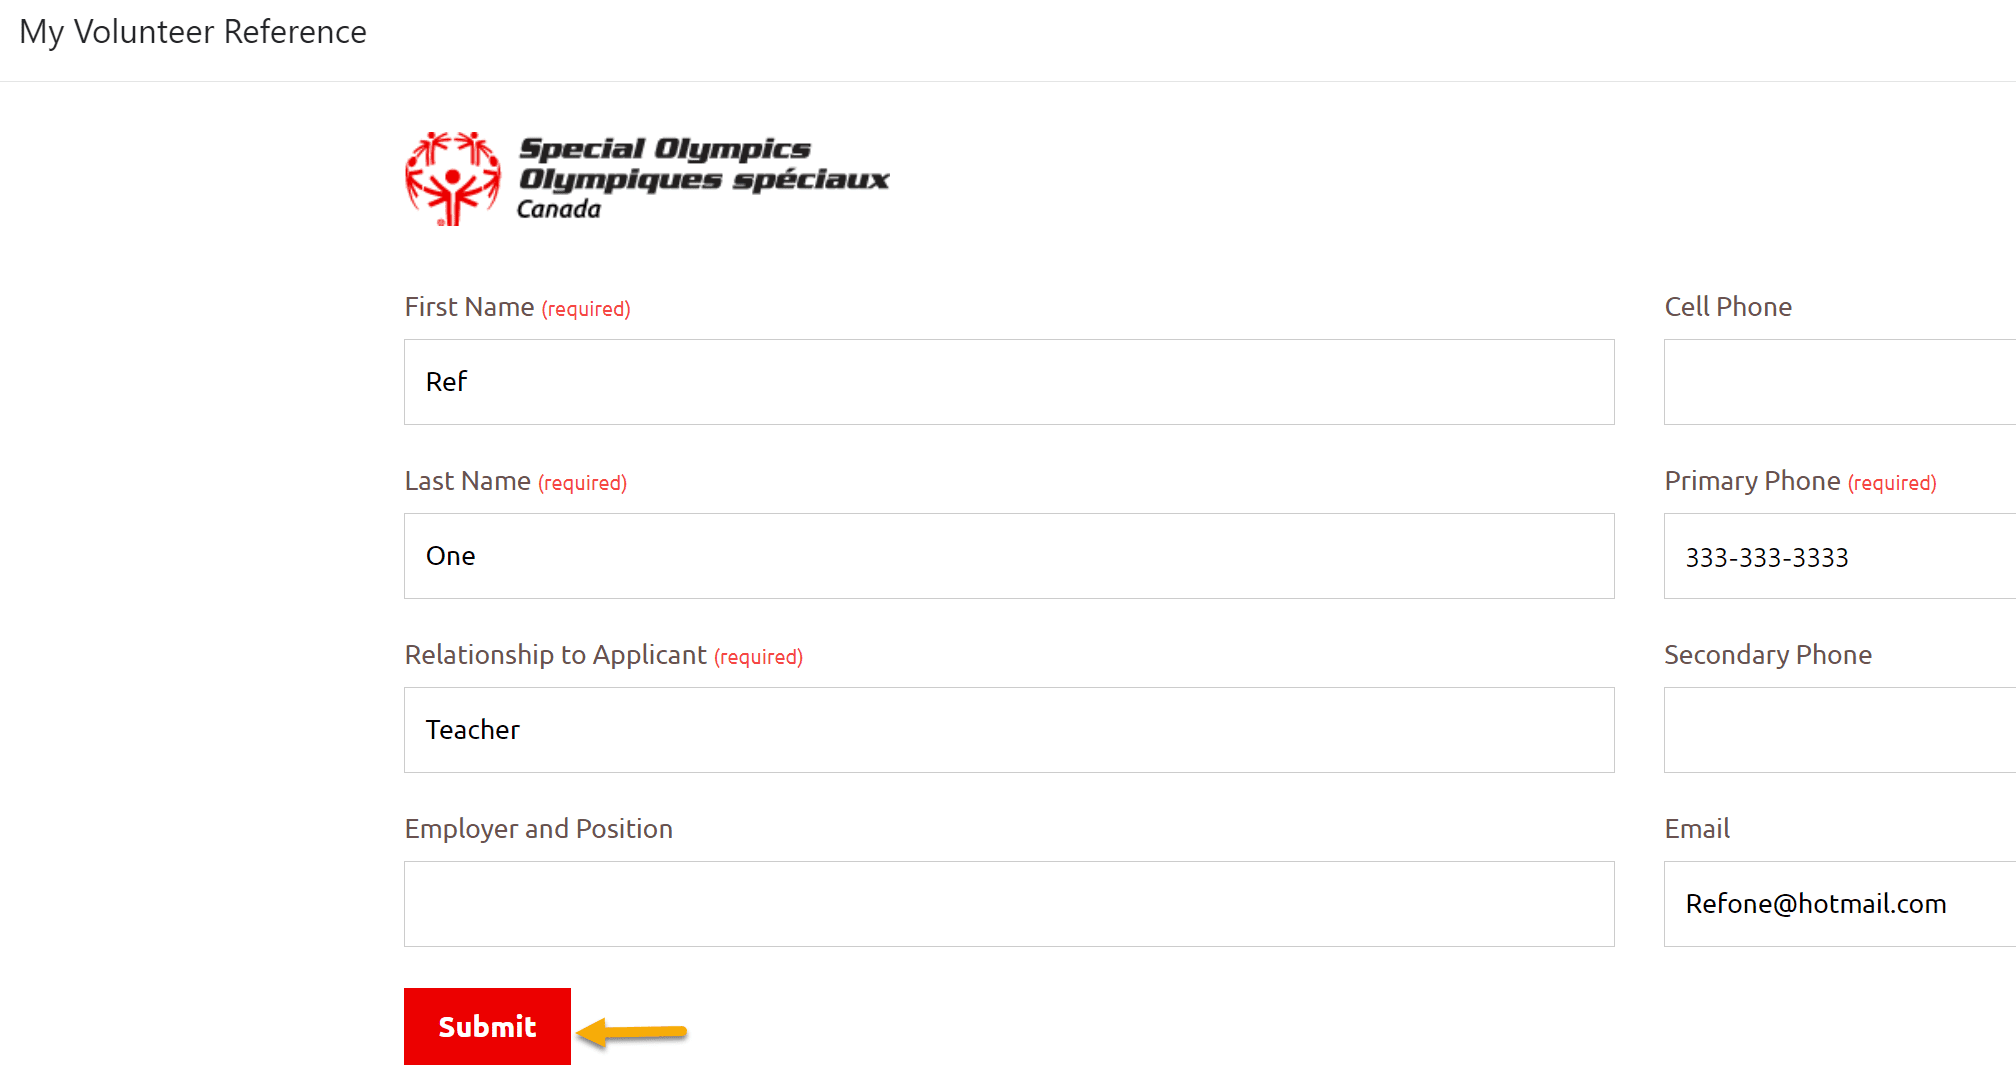
In My Volunteer Reference window, provide information in Required fields
Please provide Email address of your references, though it is not a required field.
Click Submit to save this info.
Fill out appropriate fields in Profile Additional Information
Click on Next Step

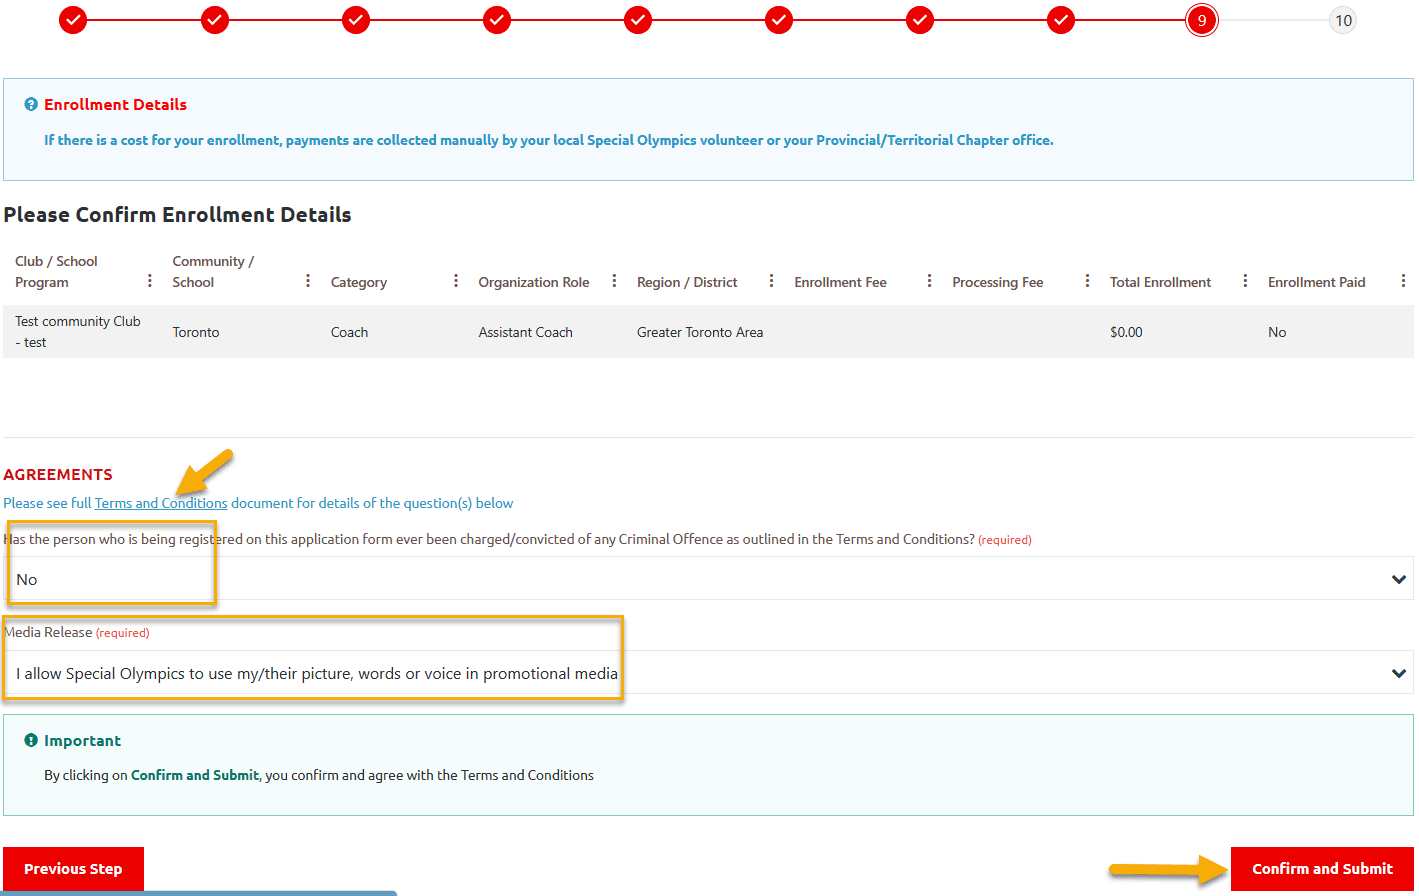
Step 9 – Enrollment / Terms & Conditions Confirmation
Review your Enrollment Details
To read full Terms and Conditions, click on the Terms & Conditions link
A window with Terms and Conditions will open. A short description is provided at top of the page and full version at the bottom.
Scroll down to read all.
After reading click Close Window

Fill in Required fields
Media Release by default is I Allow, you can select other option.
Click on Confirm & Submit to accept Terms and Conditions
Step 10 – Success Message
This window shows that your application has been submitted successfully.
System has sent you confirmation email.
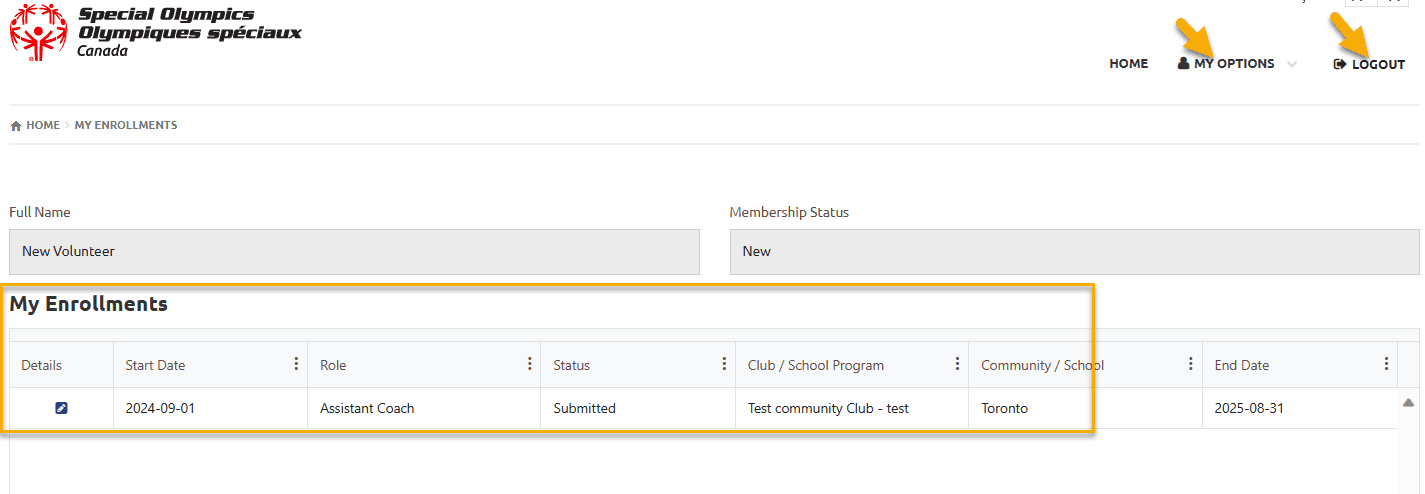
Click on See My Enrollments to see your enrollment or you can Log Out
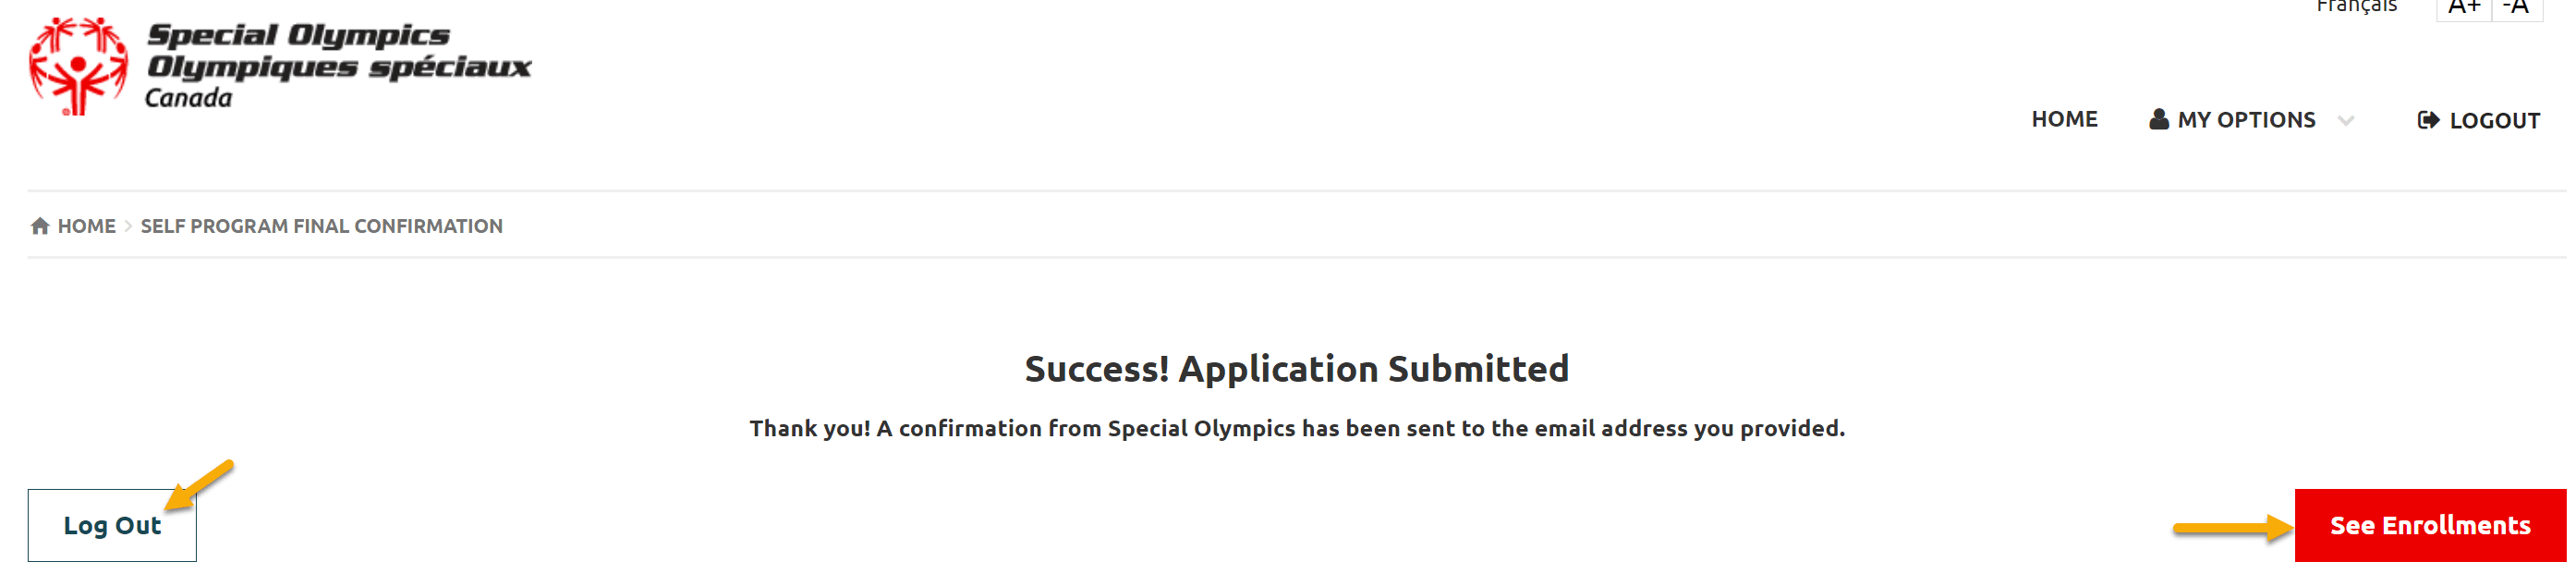
System has sent you confirmation email.
Click on See Enrollments
This window shows your Full Name, Membership Status and your enrollment with Submitted Status.
Your Community/Club Admin will review your application, will contact you for further information. Your references will be contacted by community/club admin before you can start volunteering.
Now you can either Logout or click on My Options to update/review your application information
More Topics In Club Admins
- Attendance Tracker Form - How to Record this Information
- Membership Portal Account Creation Instructions for Already Registered Members
- Waivers Data Entry by Data Admins on Membership Portal
- Session Duplicator Tool - Instructions to duplicate Active or Expired session
- Concussion Awareness - Where and How to record this information
- Usability Membership Portal - Head Coach/Team Manager Role Instructions
- Usability Membership Portal - New Group Home Coordinator and New Group Home Athlete Registration Instructions
- Usability Membership Portal - Volunteer Self-Enrollment and Waivers Update Instructions
- Usability Membership Portal Login Instructions
- Template - Invitation to Membership Portal for already registered Athletes
- Steps to follow by club admins to create and manage yearly new sessions
- Template - Invitation to Membership Portal for already registered Volunteer
- How to Enroll registered Volunteer to another Sport?
- How to upload Atlanto Axial Form or Medical Document
- Add New Club Session
- How to approve enrollments by Community Data Admin, Head Coach & Team Manager - Submitted to Approved
- Covid Declaration Form Received - Where & How to Record this Information
- Manage My Account - All Registered Volunteers - Blue Menu
- Member Enrollment Status - Full Explanation
- Membership Reports
- How to upload your Police Check
- Enrollments with In Progress Status
- New Volunteer - Community Approval Instructions
- Usability Membership Portal - Registered Volunteer Portal Login / Account Creation and Profile update Instructions
- Head Coach/Team Manager Role Instructions
- Family Administrator - Introduction
- Athlete not found in Database - Instructions to register New Athlete by Data Admins
- Instructions to add a Session
- Program Sessions - Introduction
- How to change my Password?
- How to Cancel Athlete/Volunteer Enrollment?
See Also
- Toronto Volunteers - Instructions to get Police Check
- Membership Portal - Family Admin Role Instructions to update your Athlete Information
- Membership Portal Account Creation Instructions for Already Registered Members
- New Junior Volunteer Registration Instructions
- Waivers Data Entry by Data Admins on Membership Portal